The Bluff View Guide to Climbing on Cayman Brac
Copyright © 1998-2023 by John Byrnes
April 2023 edition
This guide is offered to you free of charge and I hope it serves you well. I would like feedback whenever you discover an error, omission or get horribly lost trying to find a climb. Feedback on grades and quality ratings are always appreciated. I have tried to make the grades consistent but you know how that goes! You can contact me at jbyrnes@ezlink.com. Note: you can click on any photo to enlarge it.
Overview
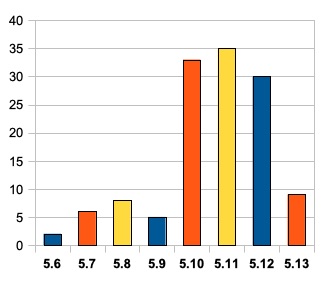
There are now a total of 128 routes on the island from 5.6 to 5.13b, with the bulk being tens, elevens and twelves. The rock is mostly clean pocketed limestone but Spot Bay is also rich in stalactites and tufas. I use a four-star rating system to give a rough idea of a route’s quality.
 Climbing Gear
There is no climbing shop on the island, so bring everything you may want. All routes are well bolted. The longest route is 35m and requires 19 quickdraws (17 bolts plus anchors). A 60m rope is good for all routes but be sure to tie a knot in the end for the longer routes at Wave Wall.
Many routes have hard starts, bad landings and high first bolts intended to be stick-clipped. If you’re staying at Bluff View, a painter’s pole with a standard thread is available so you can just bring the head: Super-clip, Squid, etc. Otherwise, bring tape since there’s usually a branch at most sectors and you can tape a draw to the branch.
The long routes at the Point require additional gear. You’ll need a lead rope plus a rappel rope. If you’re staying at Bluff View, rappel ropes are available in the shed. Ascending devices (grigri, prussik, Tibloc, Ropeman) should be taken on all routes at the Point, as well as 6 to 8 shoulder-length slings with biners. A bucket-style rope bag and comfy climbing shoes can be nice too.
When you get back home, rinse all your gear in fresh water to get the salt off.
Other Important Gear
I strongly recommend sturdy hiking shoes and a pair of gloves to protect your feet and hands while belaying and for the approaches. Wearing sandals and then being pulled across sharp rock when catching a fall isn’t pleasant and the approaches have sharp rock and all manners of cactus, yucca and thorny things.
But don’t be put off by the sharp quality of the rock you are walking on, the rock you’ll climb on is much friendlier. Bring a foam pad to sit on to change shoes, have a bite, or admire the sunset. Wear reef-safe sunscreen and a sun-hat that has a brim all the way around (not a ball cap), and plan to climb in the shade.
Guide Service

Rock Iguana Ltd. provides AMGA certified guide services in case you need a partner or don’t want to bring gear with you. They also provide lessons and adventure tours. Lots of photos on their website. Contact them at (345) 936-2722 or www.climb.ky
Bolts
As you probably know, stainless steel bolts quickly corrode in a tropical sea-side environment. For this reason Titanium bolts were developed in 2000 for Cayman Brac and are now being used in many places around the world. After 22 years they show absolutely no signs of corrosion or wear, and have been fallen on many times.
Any Steel bolt you find is NOT to be trusted. Some of the old routes still have rusted stainless bolts next to their titanium replacements. Often you can break these off with your fingers or foot so you can take it home for a souvenir.
A TI the route description means it has titanium bolts. We are using two types of titanium bolts:
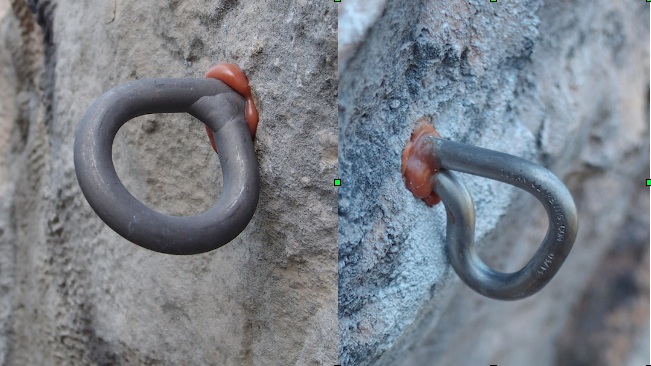
A round grey Tortuga bolt. A P-shaped shiny Eterna bolt.
Retreat
All titanium bolts can be directly threaded with the rope so you can lower off without leaving anything, just like you do at the top anchor. Please do not leave a biner or “quick-link” as both corrode shut quickly and must be removed with a hacksaw.
Belay Bolts
A good number of routes have hard starts and very high first bolts that are intended to be stick-clipped. Often these also have belay bolts off to one side. Stick-clip the first climbing bolt, then clip the belayer’s rope to the belay bolt with a quickdraw. This will prevent the two of you from smashing into one another should the leader fall low and still provides a dynamic belay. This is very nice if the leader outweighs the belayer by a significant amount! The belay bolt is easily reachable from the ground. After the leader has clipped #2 or #3, the belayer can unclip from the belay bolt and move out from the wall to watch.
Weather conditions
As they do everywhere, conditions vary depending on the weather and usually the most important determining factor is the wind. When the wind is Westerly or Northerly, Dixons will be dreamy on the windward side and Valentines will be stuffy and hot in the lee. Thankfully, much of the time the Trade Winds, out of the ENE, blow down both sides of the island.
However, if the Trades are too strong, sea spray can coat the Orange Cave areas and Wave Wall. If you get there and the holds are smarmy, you might head over to Valentines, Stargazer, Love Shack or Yogi Wall.
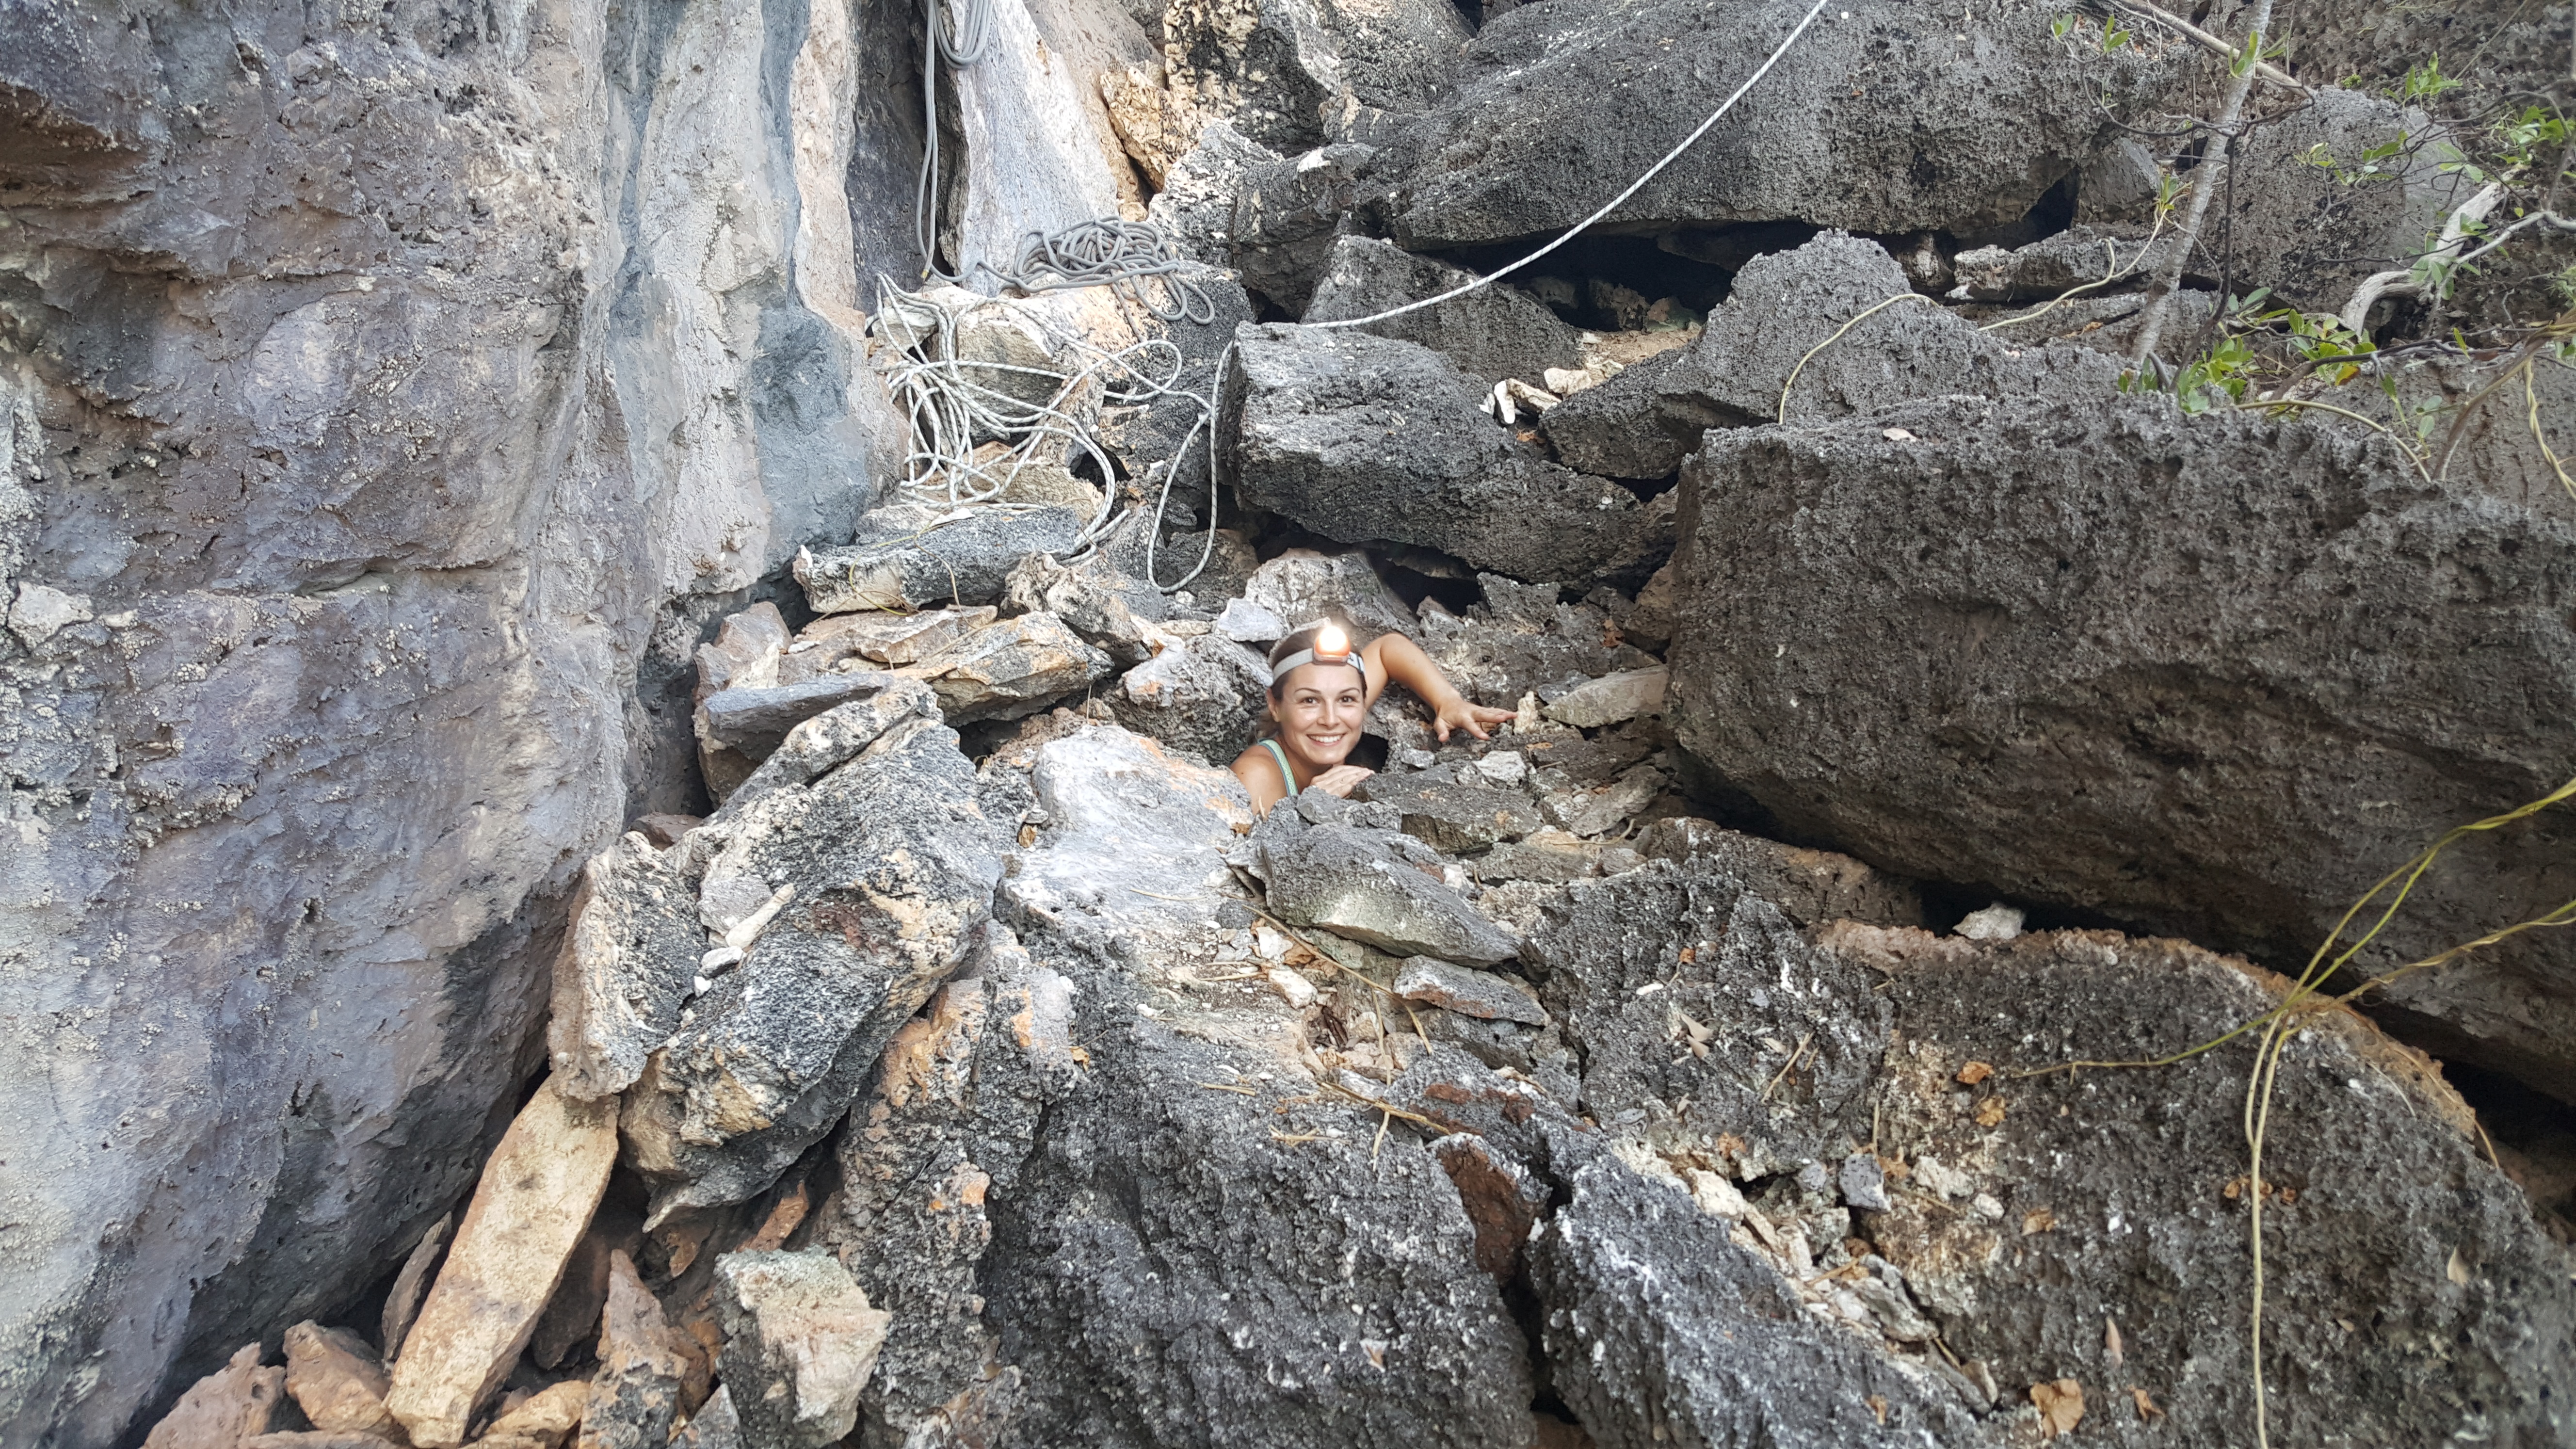
Caves
Don’t dive head-first into caves along the route, they are often full of fine silt (dry lubricant), guano, bones or other debris. Climb on the outside edges.
CLIMBING AREAS
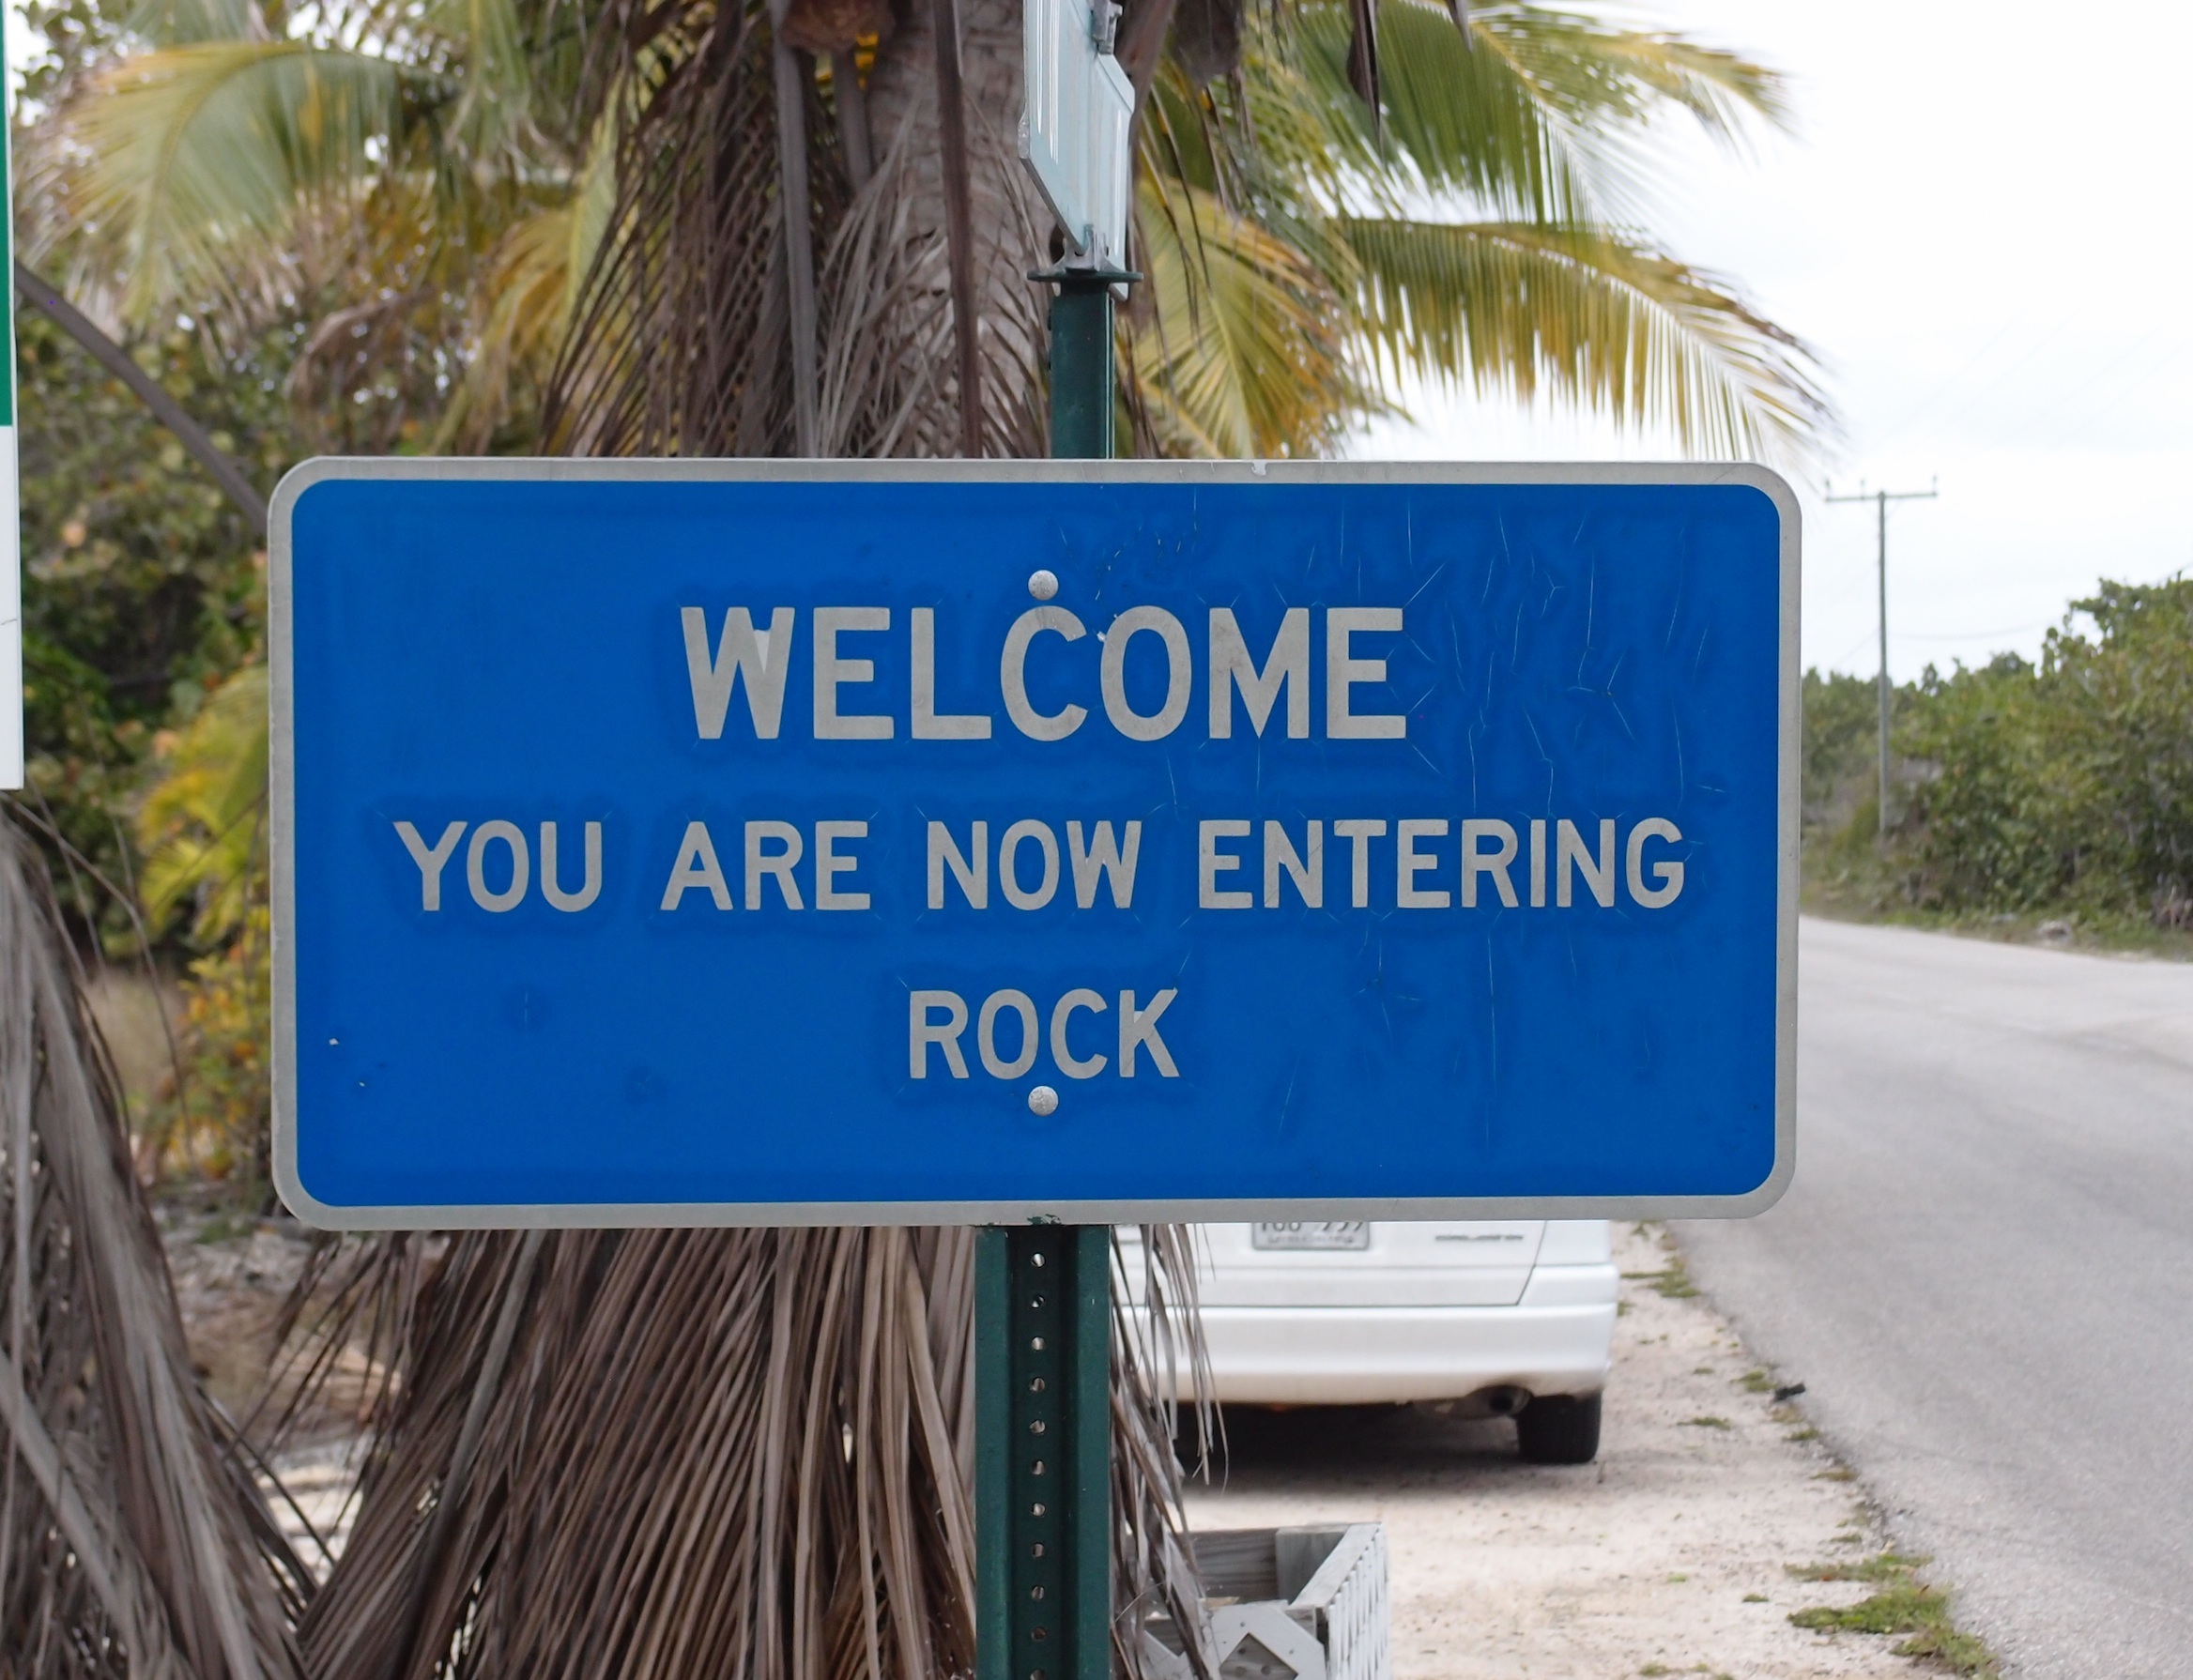
Actual sign on the north road.
This guide is organized starting at Love Shack and progresses counter-clockwise around the island. Routes over land are listed in the order you approach them looking at the rock. Routes over the water requiring rappel access are referenced right-to-left, while looking towards the water.
There are a few climbing walls that are literally in someone’s backyard and, as I’m sure you can understand, just having strangers walk in unannounced isn’t cool. If you have a chance to hang-out and climb with some of the local climbers and guides, they may invite you to climb there.
LOVE SHACK WALL
Located on the South Side Road, 2.7miles (4.3km) east of the Ashton Reid Road (a.k.a. the Bluff Road), it is easily identifiable from the road by its left angling crack and steep white rock. It’s a three-minute walk from Bluff View. Shade about 4pm in March, noon by May. Routes listed left to right. A stick-clip is recommended.

Kirk doing his lizard imitation on Leaping Lizzards. Donaldson collection
**Parrot Trooper Ti, 12c/d 4 bolts + anchor. A hard boulder problem start leads to a rest and tough technical finish. Bring small fingers. LG
*** Throwin’ the Hoola Girl Ti, 12a 7 bolts + anchor. A Houdini route, the moves are never quite what they seem. If it looks hard, it’s easy and vice versa. JE
*Bric-a-Brac Crack Ti, 12b 6 bolts + anchor. The left diagonaling seam. Shares last bolt & anchor with Hoola Girl. LG & JE
***Cayman Daze Ti, 13-something 6? bolts + anchor. Unblemished, marble-like stone. Climb small, technical holds to 11+ exit moves. Open project. VW 2011
***Cayman Nights Ti, 12c 6 bolts + anchor. The far right route. Powerful, fingery, dynamic moves on perfect rock. MS 2011
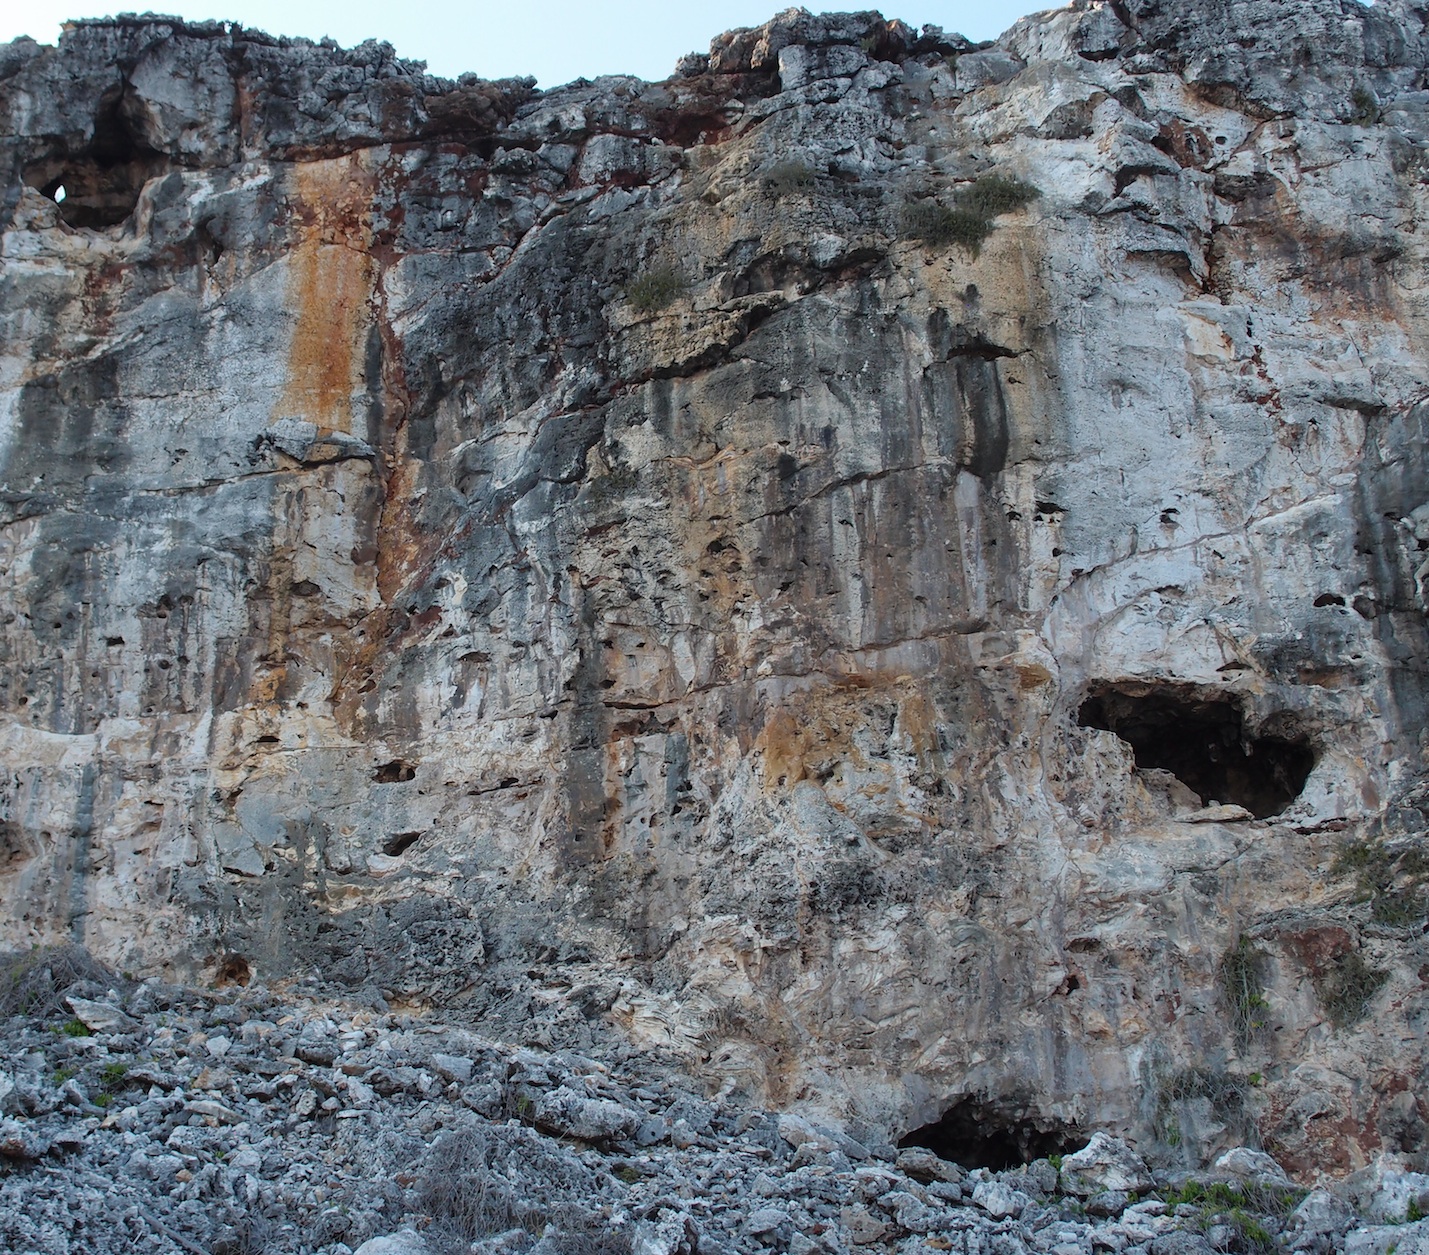
STARGAZER WALL
About 35m east of Love Shack, and a two minute walk west of Bluff View, is a stellar panel of marble-like white stone. It has a conspicuous round cave at the top with a tree growing out of it (photo). Shade about 4pm March 1st. A cairn marks the start of the trail. A stick clip is strongly recommended. These routes would all have four stars if they were longer!
John on the 1st ascent of Sirius. (Darek Kroll)
***Betelgeuse Ti, 9+ 7 bolts + anchor. (a.k.a Not so Sirius) The red giant of Orion’s shoulder. Stem, bridge and mantel to the top of the dihedral. Then swing over to join Sirius for the last two clips. Venturing into the black rock on the left will get you a taste of Orion’s sword. JB 2011
***Sirius Ti, 11d/12a 6 bolts + anchor. The brightest star in the sky. Start from either side and power up big pockets for two bolts then crank continuous thin moves to a Thank-God pocket. JB 2011
***Canopus Ti, 11a 6 bolts + anchor. Low in the Southern sky, known as “the Jewel Box”. This jewel of a route starts at the blocky dihedral on the right side of the wall. Perfect stone. JB 2011
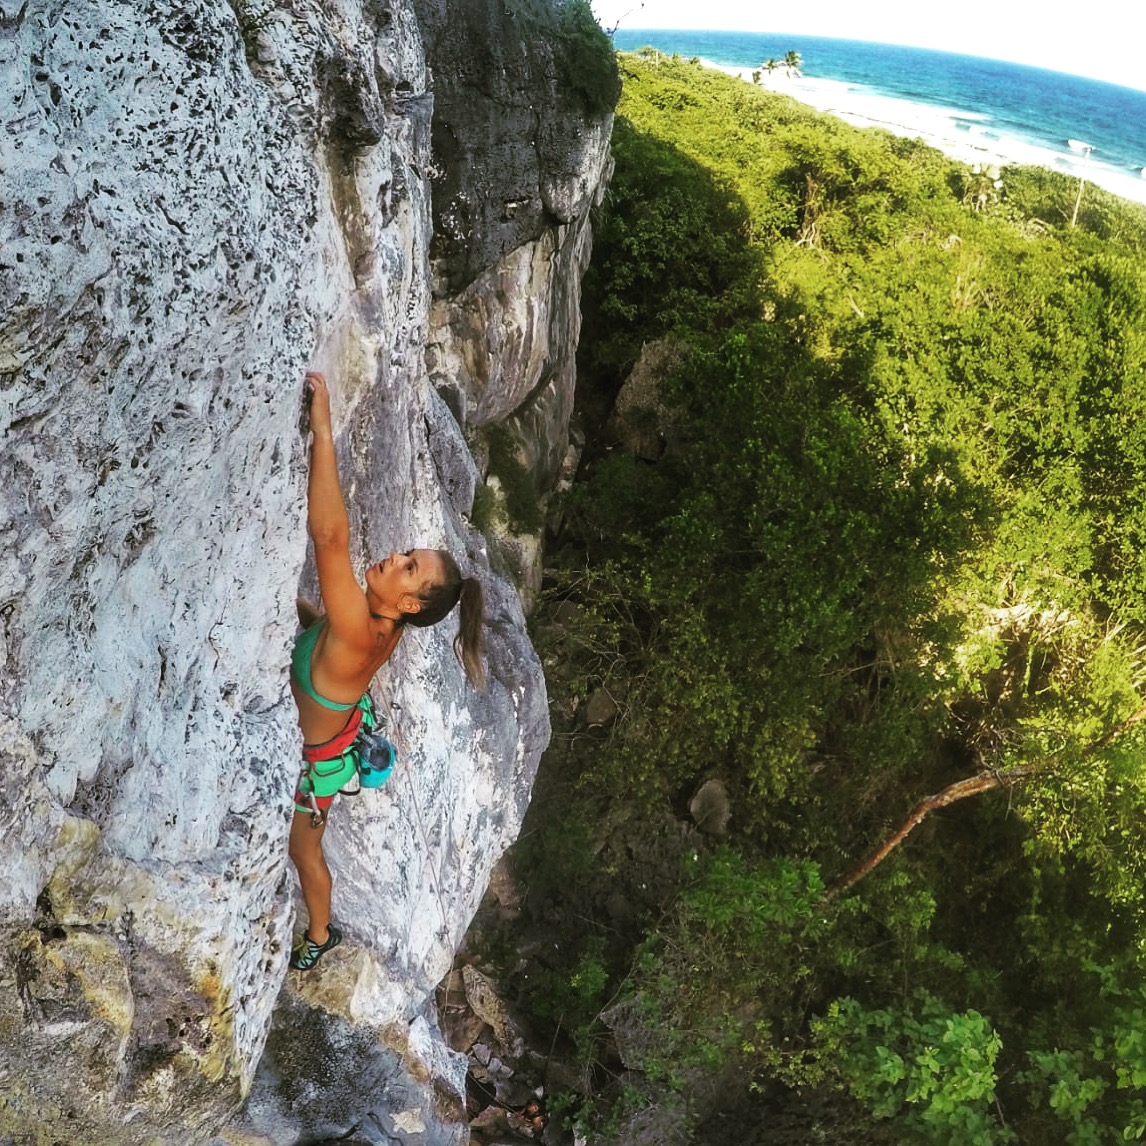
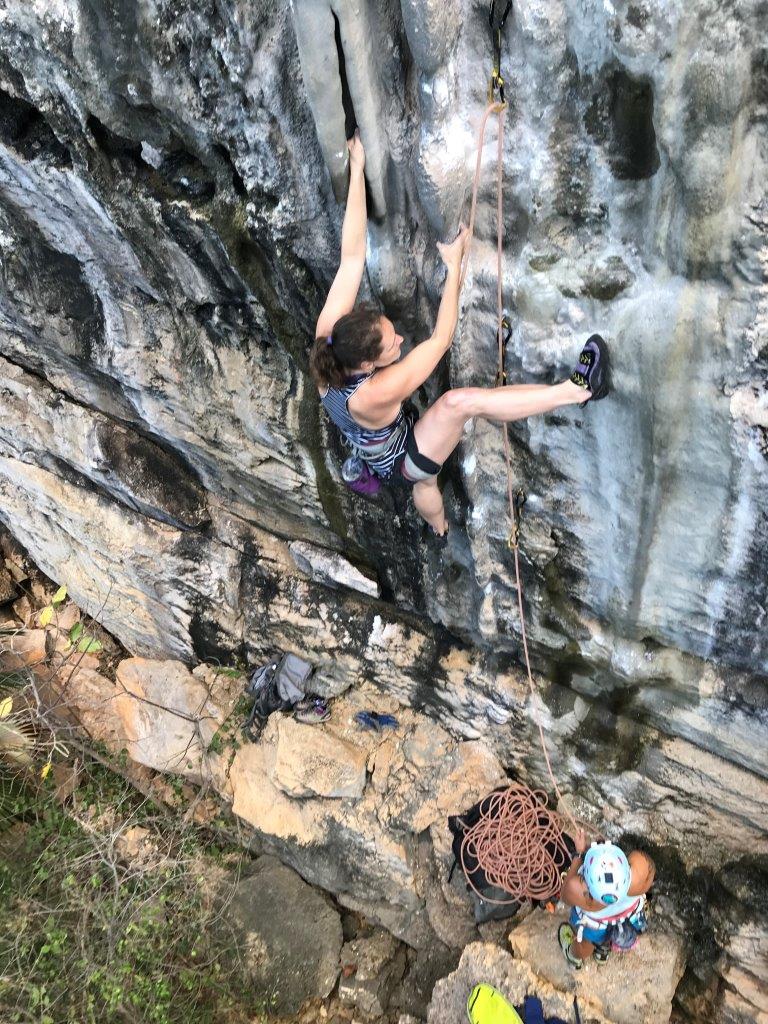
Angel on Canopus 11a, Stargazer Wall.
VALENTINES WALL
This wall is invisible from the road and is a little bit hard to find. It faces more East than the other South Side walls, therefore it goes into the shade first, about 1:30 by March 1st, although it may take 30 minutes for the rock to cool off. It’s far enough from the surf to avoid the sea spray and it gets baked in the sun every morning. The result is dry crisp edges and excellent friction on perfect stone.
Located .8km East of Love Shack or .7km (half-mile) East of Bluff View. Drive or walk past Bluff View to a pale-blue house (on stilts) on the sea-side of the road and start counting power poles. The fourth pole has a small Silver Thatch palm growing next to it (photo). Park there.
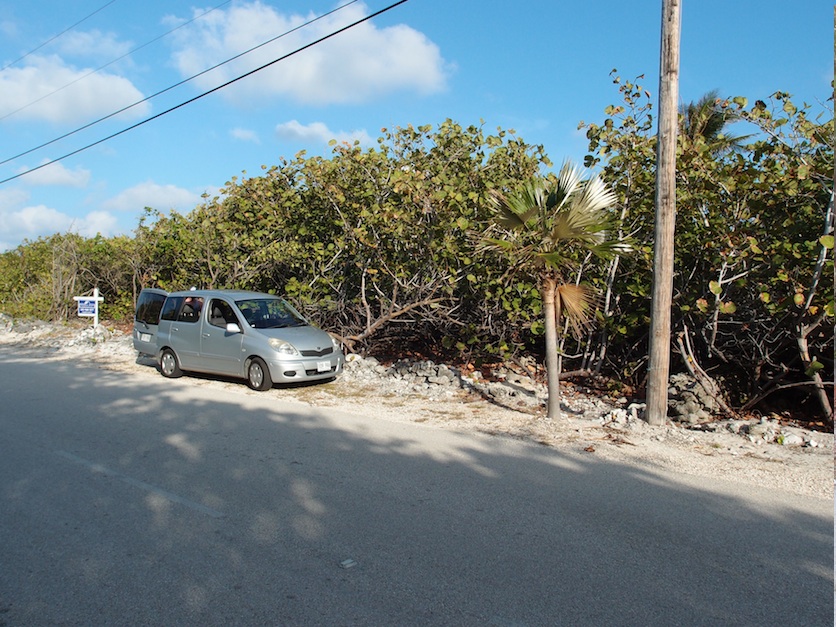
Parking for Valentines Wall
From the palm tree, look across the road at about 10 o’clock to see the “arch” in the trees, marked by some pale blue fisherman’s cord. This is the trail head. Follow the trail to the cliff, turn right and scramble about 20m to the wall. Fear of Commitment is the first route you’ll come to.
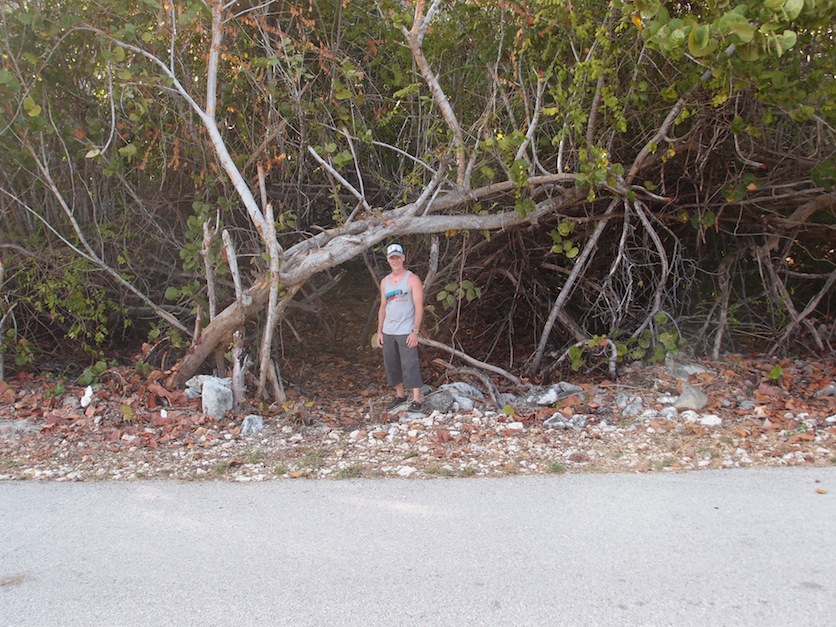
The trailhead to Valentines Wall.
All the routes have low cruxes and high first-bolts, so you’ll need a 9-10′ (3m) clipstick. The routes are characterized by square-edges, tufas and pockets with distinct, and usually short, cruxes. Have fun!
**Fear of Commitment Ti, 11b/c 8 bolts + anchor. Climb the left side of the huge detached flake then make an insecure move onto the main wall (stick-clip #2 if you wish). Easier if you stay left at the main bulge. JB 2019
****Norwegian Wood Ti, 12a 7 bolts + anchor. The stone on this route has been called “the best limestone I’ve ever seen.” Smooth, brown-purple with grain running through it, it looks like wood but won’t burn. JB 2019
**The Nose In A Day Ti, 12a 6 bolts + anchor. Thought you’d never be able to tick the Nose in a day? Start up the right edge of the obvious huge detached flake. Climb to the nose and pull directly over the bolts. A two-move-wonder with fun moves and clean air. JB 2018

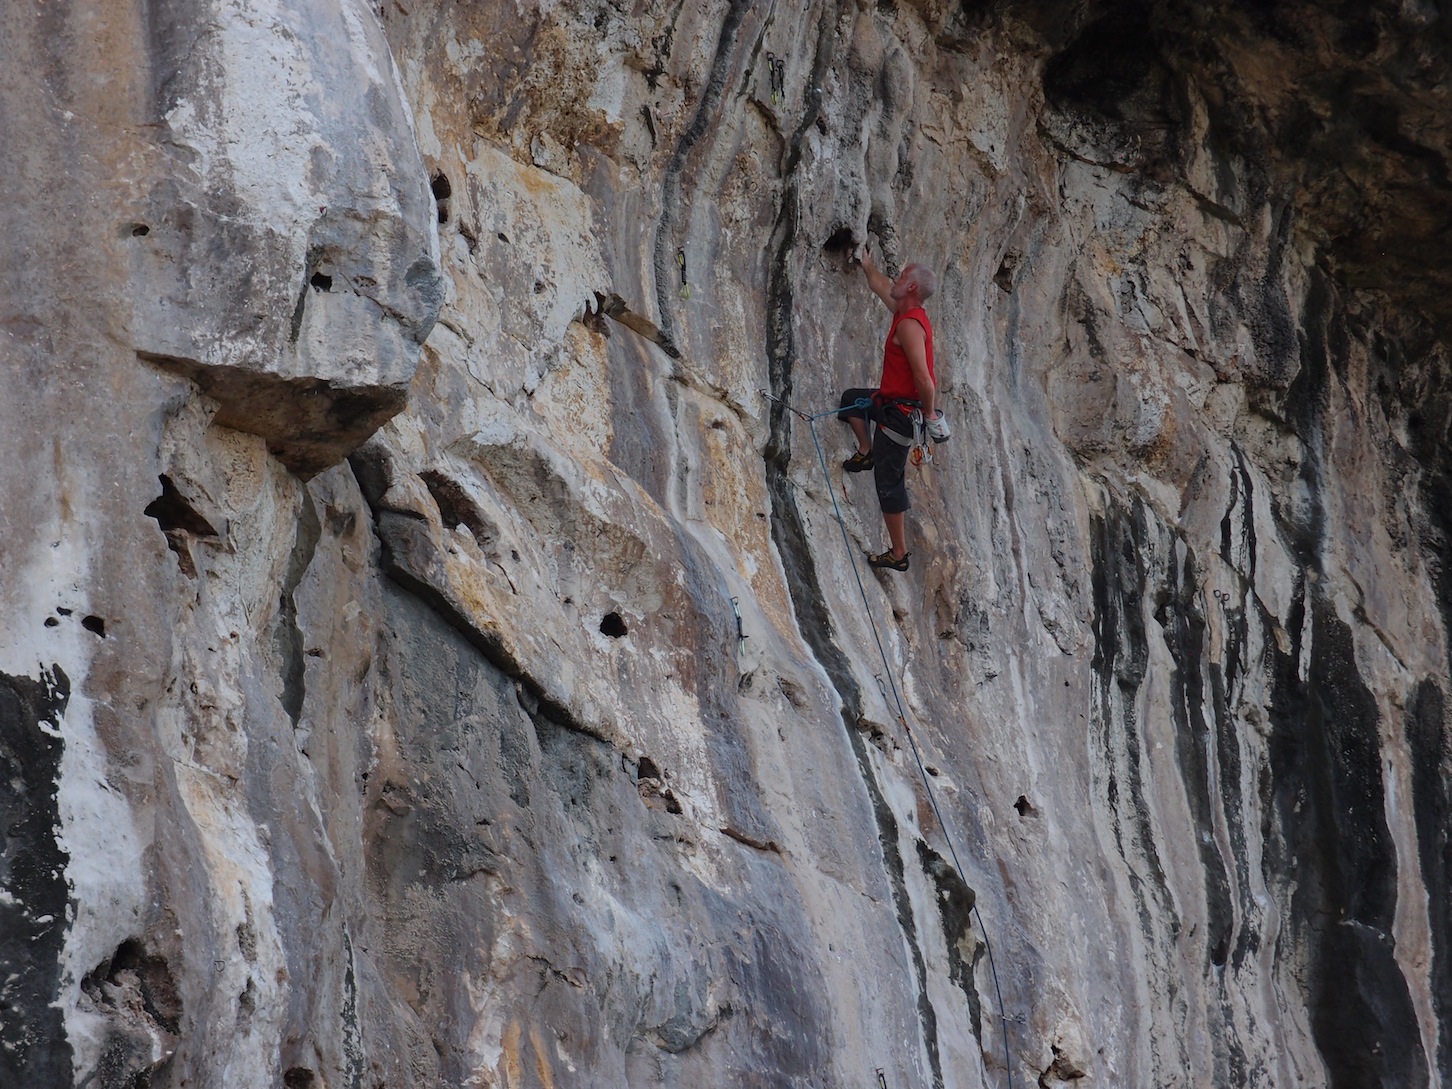
Derek ticking The Nose in a Day.
****Date-less on Valentines Day Ti, 12a 7 bolts + anchor. The king-line on the wall with perfect stone and cool moves. Start at a right facing flake and move up on a series of diagonal ramps and edges. Balance up to the V-shaped Valentines pocket then the broken heart pocket. Continue up immaculate stone. After the crux, stay left for an independent grey tufa finish. Shares the anchor with Free Snakin’. JB 2018
**Free Snakin’ and Drawless Ti, 11b 6 bolts + anchor. Free Snaking is when you top rope a steep route on the side of the rope that’s not through the draws, so if you fall, you swing out and can’t get back on. Face climb orange rock and then mantle onto an orange ramp. Continue on pockets and tufas and finish on the black tufa. Shares the anchor with Dateless. JB 2018
Jeff S milks a stalactite as he eyes the final moves for Free Snakin’ and Drawless. You can see the bolts on The Nose in a Day on the far left. The draws to his left are on Date-less. You can see the anchor bolts for Black Hole to his right. Tied to the Mast wasn’t bolted when this photo was taken. click to enlarge
***I Remain Tied to the Mast Ti, 11d 8 bolts + anchor. This route will try to lure you onto the rocks. After deciphering the opening boulder problem, follow the pockets upward but avoid the ugly bat cave half-way up. Work up perfect stone to some tufas, then right to the anchors. JB 2020
****Black Hole Ti, 11a 6 bolts + anchor. Broaden your Event Horizons! This route has very cool moves right from the get-go. Pop up to the first good edge, then follow side-pulls, edges and pockets to a tricky crux. Beware, the obvious black hole at the base of the route will suck in your rope, Gri-gri and belayers! JB 2018
**Mo’ Betta Beta Ti, 11d/12a 4 bolts + anchor. You can always get better beta! Two ways to start: Start just left of the bolt and climb up and slightly right (V4+) or start 7 feet right of the bolt on a large detached flake (V4). Both methods use small powerful edges and obscure footers. Once on the brown rock it turns into pocket pulling with three distinct ways of doing the final moves to the anchor. JB 2018
Ioana crossing the event horizon below Black Hole.
THE ORANGE CAVE
This large area is broken into four sectors: 1) the Orange Cave itself, 2) Theology, 3) Orange Streak and 4) Seahorse. Shade about 3pm March First.
Park at the East-end of the South Side Road where there’s a sign for The Great Cave. Walking on the iron-shore is easier than on the loose sand and coral heads. Walking times are for a casual pace. Routes are listed left to right. A stick clip is recommended.

Climbers at the Orange Cave
Sector Orange Cave
From the parking, hike about 4 minutes east along the iron shore until you’re opposite the Orange Cave (cairn), then hike up to the base; 10 minutes total. CAUTION: About 30-40ft right of Lord Slime are two old routes with steel glue-in bolts. DO NOT CLIMB THESE!
**Chum Buckets Ti, 10b 5 bolts + anchor. The left-most route starts outside the left side of the cave. Fun big moves on big holds leads to thoughtful climbing on the headwall. The very first route on the Brac. SH
CAUTION: When cleaning or top roping Goin’ to Cayman or Orange Fantasea, be very aware that rope-stretch may cause a swinging climber to crash into the boulder at the cave mouth! Clean the bottom bolt by clipping directly into the bolt above. Stand up to belay and keep the rope tight!
**Goin’ to Cayman with a Snorkel in My Jeans Ti, 10d 5 bolts + anchor. Gymnastic climbing up the left side of the cave leads to a devious headwall. Obviously, you should stick-clip the first bolt. CL

Katy demonstrating the “approved” beta for Goin’ to Cayman with a Snorkel in my Jeans.
**Orange Fantasea Ti, 11a 7 bolts + anchor (shares anchor w/ Snorkel). Start inside the cave on the right. Powerful pulls lead to a bizarre rest. Pull the lip while the cameras click. Use double-draws on the third and fourth bolts to avoid rope drag. CL
**L’ Orangerie Ti, 8d 5 bolts + anchor. Starts just right of the cave. Find a good sequence for the start and it’s 5.8. SH
*Boy Georange Ti, 8d 5 bolts + anchor. Was that a Karma Chameleon? Stick clip #1. Better than it looks with a tricky crux at the last move. JB & VW 2011
** Lord Slime Ti, 7+ 4 bolts + anchor. Lots of options until the steep finish. Don’t be fooled, even though it looks blank, climb directly over the last bolt. JB & VW 2011
Sector Theology
A two minute hike on the flat past the Orange Cave, is a “caved-out” area with a low roof.
***Ick! Theology! (I’d Rather Study Cod) Ti, 10b 9 bolts + anchor. After piling cheater stones as high as your conscience allows, boulder past a bolt, pass a small cave, then haul steep jugs to the top. A perennial favorite. EH/SRB/AP 2000
**Nameology Ti, 10c. 8 bolts + anchor. A harder boulder problem than Ick! makes stick clipping #2 a smart move. The climbing above is steep fun. A double-draw in the cave will prevent rope drag and cross-loading the biner. MS & JB 2011
Sector Orange Streak
Sector Orange Streak. Fake Left, Move Right passes the cave on the left then follows the white rock. Byrnes
*Brac Snack Ti, 6 3 bolts + anchor. Too short but sweet. SH
**Orange Streak Ti, 7 6 bolts + anchor. Climb cool pockets and edges, then lay back and stem the dihedral. Unknown
*Shark Bait Ti, 9+ 5 bolts + anchor. Climb moderate fun rock to a big crux move right at the end. Unknown
* Caymanite Bite Ti, 5.6 3 bolts + anchor. Beautiful fossil and Caymanite formations form huge jugs. Short and sweet, a good beginner lead. WV-2019
***Fake Left, Move Right Ti, 10d 7 bolts + anchor. Bolted during March Madness. Some people love this route, others not so much. The white holds in white rock can be hard to see. The route jukes and weaves with some spicy sections, so both you and your belayer need to be alert! And yes, Virginia, there is a clipping hold at the anchor. JB 2012
Sector Sea Horse
About 20 minutes from the car. Hike past First Cay (photo) to the bottom of the Seahorse, a 40-foot freestanding tower. You can scramble up left of the Sea Horse, pass below Ocean Pony, to get to Bananaquit. Or, when the swells are moderate, pass below it and then up, as you would for the Wave Wall.
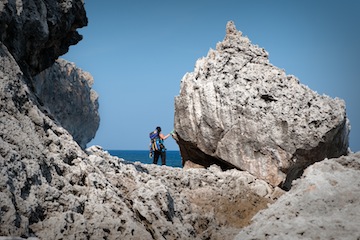
First Cay is your first landmark on your way to Sector Seahorse and the Wave Wall (in the background). Donaldson
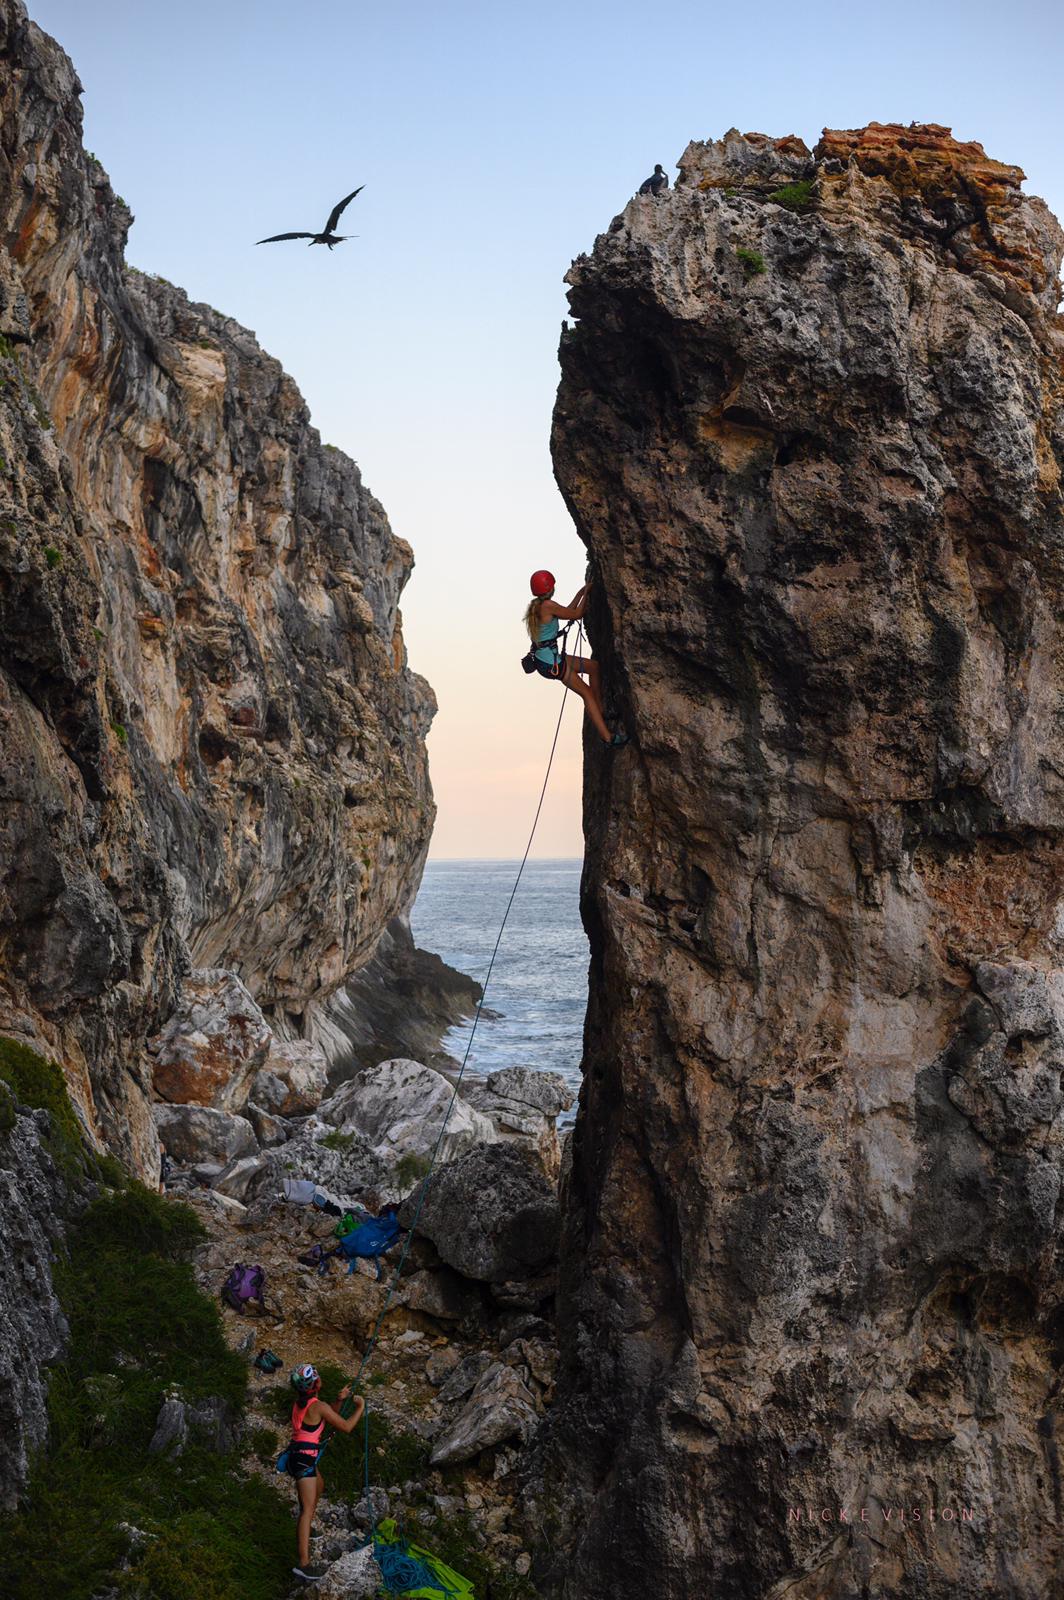
These first two routes are on the Seahorse itself. They are short but have an outstanding position, overlooking the ocean on both sides. Bring your photographer! In the winter, there is shade only in the early morning until about 10am. In the summer there is shade most of the day, except around high noon and the routes are very exposed to sea spray in agitated seas, making this a better summer crag. Frigate birds (a.k.a. Man’O’War) begin to roost on top of the pillar about an hour before sunset – please finish climbing before they arrive and be quiet as it gets dark.
** Sea Stallion Ti, 5.11b/c 6 bolts + anchor. Starts on the west side of the pillar in the white overhanging rock. Sequential moves lead to a full rest, followed by a difficult boulder problem before the last bolt. Mandatory stick clip. RI-WV 2020
**Ocean Pony Ti, 5.9+ 6 bolts + anchor. Climb up the northwest arête of the Seahorse on the darker rock. Fun and technical but pumpy, so you might want to warm up on something else. Traverse left to the last bolt and the anchor, and take a minute to enjoy the spectacular views at the top. RI-WV 2020
Topping out Ocean Pony as the sun sets with one frigate already roosting and another circling.
The next two routes start on a small terrace right of the Seahorse and left of a large, orange undercut section of wall that contains a multi-tiered cave system (see photo).
**Bananaquit Ti, 7 11 bolts + anchor. Although a lot of work was done on this route in 2015, the bottom section is still a bit sharp. Surmount a cruxy bulge, then drift a bit right and up into a steep and enjoyable groove to finish on a small ledge on the left. The anchor is a titanium U-bolt with lowering ring, plus a standard glue-in for backup. Thread both the ring and the backup when lowering. JA 2014
***Flying the Colors Ti, 11c/d 12 bolts + anchor. Start 10′ right of Bananaquit and scramble up (5.1) to the first bolt. Work through the grey rock to good stone above. The climbing is continuously interesting as it wanders left and right across the bolt line, getting steeper all the time, and finishes on an exposed prow. Tremendous position! JA 2014
Climbers on Bananaquit (left) and Flying the Colors with the Seahorse Pinnacle behind them. Donaldson
Anemone Ti, 12c/d 10? bolts + anchor. This starts from the high point of the boulder pile to the right of the undercut orange cave, starting in spongy gray rock (easy but unnerving), up pockets, then out an overhanging wall. JA 2014
The next route, and its extension, require some unusual rope-work because of its overhanging start followed by a low-angle slab. If you were to fall on the upper part of the route, or took while working it, the rope would be dragged hard over the steep-to-slab prominence — possibly damaging your rope.
Here’s one way to avoid damage when you only have one rope. Climb to and clip bolt #6 on the slab. Then downclimb (5.4) to bolt #5 (good stance) and clip directly into it with a draw. On the belayer’s side of the rope, tie an 8-on-a-bight and clip it to your harness; now you’re anchored to bolt #6, too.
Have your belayer take you off belay. Pull the rope up and through the first four quickdraws (not #5), dropping it back to your belayer, who will put you back on belay and tie a stopper knot in the end of the rope. Check each other, undo your anchors and continue!
*** Man’O’War Ti, 11d 13 bolts + anchor.
Scramble down the pile of loose rocks, about 100′ past Anemone to the steep white rock. A tough boulder problem off the ground (stick clip #2) from a side-pull rail leads to sustained 5.11 moves for the first 5 bolts. Bring 3 – 4 long draws for the easy slab after the 5th bolt. Continue up the steepening wall and move right from the 13th bolt for the final crux and the anchor. A long adventure! RI-DV/WV 2020
** Kleptoparasite Ti, 12d/13a 3 bolts + anchor (Total 16 bolts + anchor) Extension to Man’O’War. From the 13th bolt bust left to reachy & powerful moves between small 2-finger pockets. Continue up and left to the dihedral and the bouldery crux on tiny invisible crimps. A 60m rope just barely gets you back down; tie a knot in the end of your rope. Takes you all the way to the top of the Bluff! RI-DV 2020
THE WAVE WALL
The Wave Wall is another 10 minutes of scrambling past the Seahorse (30 minutes total from the car) and offers a variety of long, high quality routes. It goes into the shade about 2pm in March. Unfortunately, it is only approachable during calm to moderate seas. Boots and gloves recommended for this approach. Since carrying a clip-stick on this approach is difficult, the first bolt will be reachable from a good stance.
Park as for Orange Cave (above) and hike east to First Cay (photo above). Pass above it, then below the Seahorse pinnacle. Here is the test: if you can’t pass below the Seahorse, even by timing your crossing between waves, it’s pretty certain you won’t be able to safely cross the sloping rock shingle beyond either.
Once past the Seahorse pinnacle scramble through a boulder field at mid-height (cairns) and come to a section of sloping rock with the overhanging wall on the left and the water on the right (photo). Even moderate waves can make this section dangerous! When the sea is calm, walk low to the last large shelf (~100m) and it’s 2nd class. Moderate seas, stay halfway up the slope on dark rock: 3rd class. Big seas, stay on the white rock: 5th class!

The approach to Wave Wall during moderate seas. When the waves are breaking high enough to wet the dark rock, it’s basically suicide to try this approach. Donaldson
**The Huckster Ti, 12c/d 6 bolts + anchor + belay bolt. The first route you come to starts about 50′ past the stalactite pillar (photo above) and below an obvious cave. Big moves between pockets. Hucking amazing! JA 2013
***Get It Together Ti, 12d/13a. 8 bolts + anchor. Starts about 10′ left of the belay pillar described below. Steep, sustained, juggy climbing leads to a very difficult, small-hold boulder problem past the last bolt. Angle right to finish at the Pirates anchor. JE
****Pirates of Penance Ti, 12b. 5 bolts + anchor. Steep climbing with big holds and big reaches leads to a tricky crux layback sequence past the last bolt. A sporty run out on good pockets takes you up and left to the anchor. On you the whole way! JE
***Pirates of Pissants Ti, 12d. 6 bolts + anchor. Powerful, continuous pockets on a steep, white shield of rock. Bring small fingers. JE & LG
****Conched Out Ti, 10d. 7 bolts + anchor. After deciphering the starting moves (climb directly over the bolt), pull through beautiful Caymanite bands and crystal grape-clusters in a small cave. Angle right to the last bolt and anchor of Frolickin’ Frigates. LG
***Frolickin’ Frigates Ti, 10c. 8 bolts + anchor. Climb up to a ledge, and then crank directly over the bolt on the finger of rock (or worm your way around it). Now race the pump to the anchors. LG
For the next two routes, about 25′ past Frigates, dump your packs on a comfortable platform, about 10′ above the approach shelf, which has many little “stash caves” and a 5 foot long caymanite band below Blackened Durgon.
***Booby Trap Ti, 10b. 8 bolts + anchor. A few feet left of the platform, at about head level, is a solid thread and a flat spot for your belayer’s feet. Anchor your belayer here with some long runners. Traverse left to the first bolt then climb a panel of perfect white stone. Climb the white pillar on either side (left is harder). JB 2014
Locals were fishing while I was bolting the next route. I thought they were crazy, dodging big waves in bare feet on sharp rock. They thought I was crazy hanging from a rope on a cliff. We bought a dozen black durgons from them and cooked them in Cajun spices that night.
**Blackened Durgon Ti, 9/10a. 11 bolts plus anchor. Start at a 5′ long caymanite band and climb to the big roof/bulge. Clip the bolt over the roof, then move up and right. (Going right earlier is easier but very sharp.) This route is loaded with fossils and caymanite. A new-style titanium anchor is at the top: thread both the fat ring and backup bolt. JB 2014
Recognize the next two climbs by the vertical, white rock which leads into a shallow alcove, then up to a scooped dark roof, and then over this to a vertical white head wall. You need a 60m rope to lower from the top anchors, although you can lower/rap twice by using the Ray’s Gar and Krill anchor with a 50m.
**Reef on This! Ti, 10d. 13 bolts + anchor. Pick a hold, any hold…until the finish. Shares the anchor with Parrot Preserves. LG
****Parrot Preserves on Rye Ti, 10d. 11 bolts + anchor. Climb moderate rock to the overhang, crank that and find the technical crux above. LG
Jumbo Shrimp Ti, 10c. 2 bolts + anchor. An extension to Reef on This / Parrot Preserves will get you to the top of the bluff and within 15 minutes of Spiral Staircase. A 60m rope will just barely get you down (tie a knot in the end) or rap/lower twice using the Ray’s Gar and Krill anchor.
If you get trapped by big waves climb Jumbo Shrimp to the top of the bluff. Then walk away from the edge, on a 20 degree angle to the right, about 200m to a road. Turn left on the road, and walk about 1.5 miles to the Lighthouse Rd, passing a goat farm and a gate along the way. At the road, go left again to a round house for help, or follow Peter’s Road down to Spot Bay. EH 2000
**Ray’s Gar and Krill Ti, 8. 3-4 bolts + anchor. Climb either Reef on This or Parrot Preserves to the two-bolt anchor below the big overhang. EH 2000
For several decades a life-sized statue of a black pirate, cutlass in hand, dominated the departure lounge at the Grand Cayman airport. Next to him was a story-board titled “The Legend of Big Black Dick” in large print. Unfortunately, we have lost his grinning visage, and a good chuckle, but his legend will live on!
****The Legend of Big Black Dick Ti, 10d/11a. 12 bolts + anchor. Start climbing about 30ft right of Parrot on featured vertical rock just right of a blunt pillar. Negotiate the slab, then power up the pockets. Don’t be strikin’ yer colors before the anchors on the overhanging arete. JB 2012
John on Unsuspecting Remora.
***Unsuspecting Remora Ti, 12a 10 bolts + anchor. Climb pockets up a black and white streaked face (watch out for shark-bite!) to a rest. Steep jugs left of the cave lead to a devious, difficult finish. Take a doubled draw for the first bolt on the headwall. EH
***Shooting the Curl Ti, 10a 8 bolts + anchor. This route is easily identified by the bright orange rock, right-diagonaling crack and caymanite band at the start. Take a double draw for the bolt in the cave. SH
**Hang Ten Ti, 10d. 9 bolts + anchor. A difficult start leads to a good rest. Use it because it’s pumpy the rest of the way to a difficult blind finish. Put most of your draws on the right! Shares the anchor with New Wave. SH
***New Wave Ti, 10b. 8 bolts + anchor. After a stiff start, jug-haul into a small cave. Climb out the roof of the cave (look down here!) to another crux at the final bolts. Take a double-draw for the bolt in the cave. JE
The next route starts off the end of the large shelf, where it becomes impossible to walk further along the cliff.
****Old School Ti, 8 7 bolts + anchor + 2 belay bolts. Starts on a stepped shelf with two belay bolts. If you’re not on a bucket, you’re off route. Best route of its grade. JE

Climbers on Hang Ten and Old School.
The next two routes usually require a belayed traverse. Get on belay and clip the Old School anchor. Stay low at the start following a line of footholds (5.4) and clip a bolt or two on your way to the belay bolts. When lowering, cleaning or following these routes, stay trammed-in to your belayer’s rope all the way down, or you’ll be swimming! Your belayer must be clipped into the belay bolt, of course. Astounding position over the crashing waves.
*** Crab Dance Ti, 11c/d. ~9 bolts + anchor + belay bolt. Start from the third bolt of the via ferrata, about 40′ right of Old School, at a stance just big enough for a belayer and a flaked rope. Lots of variety and steepness, but some sharpness too. Feedback on grade, bolt count and quality welcomed. JA 2014
*** Salty Dog Ti, 12a. ~11 bolts + anchor + belay bolts. Approach as for Crab Dance but continue for several more bolts to an exposed belay station below an extensive cave hidden in the cliff above. Climb an overhanging pillar on the right side of the cave, past one difficult section, to a no-hands rest at a “window” in the cave. Engage the very steep, pocketed bulge above and continue to anchors. Lowering directly off this route will land you in the breakers, so remember to stay trammed-in (see above). Still a bit sharp in places. Feedback on grade, bolt count and quality welcomed. JA 2014
ADVENTURE CLIMBING AT THE POINT
Read this TWICE before climbing a route at the Point!
Climbing at the Point and Edd’s Place is an amazing and unique experience. However, it can turn into a serious situation should anything go wrong. Remember that unless there are some other climbers around, and you somehow manage to communicate with them, no one else on the island can rescue you but you! Always carry ascenders (prussik, Tiblock, Ropeman) on all routes!
Often the wind and the sea breaking on the cliff make it impossible to hear each other while climbing. Establish rope signals (see below) or make other arrangements to communicate with your partner before rappelling over the edge
Always evaluate the surf conditions before rappelling. Be sure your targeted belay stance isn’t being hit by big waves or wind-driven spray. If the belay looks wet it often means it’s been hit by a big wave within the hour and will be again! You might choose another route or a different area for the day.
Setting up the rappel (abseil)
The rappels present unusual, time consuming challenges for many climbers, especially since most routes overhang and you’ll be rappelling on a single rope. In addition, you’ll be in the sun during the set-up and while belaying up your second. I’ve seen a lot of really nasty sunburns!
Slide a piece or two of garden hose (in the shed at Bluff View) over one end of your rappel rope and using slings, anchor it to a tree or thread on top of the bluff. Slide the hose into position to protect the rope from any sharp edges and/or stuff some other padding under it. Don’t throw the rope yet.
Tie a figure-8 on a bight (below the hose) with enough slack for the knot to hang about 2′ below the bolt anchor that’s over the edge of the cliff. (This slack will allow you to get on rappel.) Use a locking biner on your belay loop to clip into this “safety knot” and down-climb to the anchor.
Now, clip two quickdraws to the anchor bolts and clip directly to their top biners using two runners girth-hitched to your harness (not your belay loop) — now you have both hands free.
Leaving about 10′ of slack between knots, tie another 8-on-a-bight and clip it to the quickdraws in the anchor. Move your runners down, one at a time, to the bottom biners on the quickdraws. You should have enough slack to get on rappel — you’ll be hanging from the quickdraws and can unclip from the safety knot.
Clip the free end of the rappel rope to the back of your harness to keep it out of the sea. Now you can toss the rope (or if windy, stack it on your lap) and get on rappel in the normal way. The slack you left between knots allows your partner to pull up the safety knot, clip it, and down-climb to the anchors while you’re rappelling.
Depending on your device, you may want to add friction for a single rope rappel. Adding a second biner will increase friction for ATC-like devices.
The first person to rappel takes the quickdraws and lead rope in a bag; a bucket-type rope bag is best. As this person descends, they must clip the rap line into enough of the bolts to stay in contact with the cliff! If they don’t they may find themselves hanging 10′ from the wall and 30′ above the water. (Shit, time to get out the ascenders!)
When the first person gets to the belay anchors, they clip-in using the slings girth-hitched to their harness, then clip the end of the rap line into the anchor too. It’s very important to maintain control of the end of the rap line. The second person down unclips the rap rope from the draws as they descend and may end up free-hanging over the sea. The first person then pulls them into the belay.
NEVER use a long (70/80m) rope, do a double-rope rappel and pull it down to use for leading. If the wind doesn’t make it get impossibly snagged on something, it will certainly end up in the sea. Furthermore, having a fixed rope is essential for self-rescue (prussik, Tibloc, Ropeman) if for any reason you should not be able to climb the route.
One of the most common mistakes is for both climbers to rap down and then discover they left the lead-rope on top of the cliff! To combat this, we’ve developed the “one-two-three” check before starting the rappel:
- Am I safe? Double check your rap setup, anchors and harness.
- Am I taking everything I want? Such as the lead rope, draws, ascenders, camera and chalk bag. The person still on top can get things for you.
- Am I leaving everything I don’t want? Such as sunglasses and hat (you’ll be in the shade). If I’ll be leading, I stuff my hat and sunglasses into any convenient hole near the top anchor so I can put them on while belaying my second and not get sunburned.
After the leader reaches the top of the climb, they should belay from the anchors below the rim. Since it’s often difficult to hear each other, the leader can pull up the rap rope as an unmistakable ”Off Belay” signal. Afterwards, I use 3-slow-tugs for ”On Belay” and a 2-tug response for ”Climbing.” In general, any sharp tug on the rope is “take” and a long slow pull is “slack”.
Obviously, you can belay your second up and over the top and take them off-belay. Then clip to the safety knot, clean the anchors and climb up yourself.
Finding the routes
A T in the route description indicates the route area has been Tagged with a yellow marker at the top of the cliff to help you orient yourself. These are often tucked into pockets or depressions to keep them out of the elements. Nonetheless, each year a few tags deteriorate and disappear. I replace them regularly, but I apologize if one is missing. (All verified or replaced March 2020) I tie them on with white clothesline, which never blows away.

Look for yellow tags like this to identify routes when on top of the Bluff.
BOLT COUNTS
At the Point and Edd’s Place the bolt count is designated as: 2/10/2, meaning there is a 2 bolt belay at the bottom, 10 bolts on the route and 2 bolts at the top. Always take a couple extra draws and a half-dozen long runners.
Brown Boobie Birds

Hamilton
The Brown Boobie is a protected species that climbers must be considerate of. They nest on top of the Bluff and on ledges alone or in small groups. One year they will be nested in one area and the next year somewhere else.
If you find a nest (a sitting adult with eggs or fledgling) please be respectful. They are quite tolerant, so if you get prepared away from the nest and then move slowly to the anchors, they’ll usually squawk at you but not flush. You don’t want to flush the parent leaving the egg/young unprotected for any length of time. If the parent flushes, they will usually return immediately if you move away (i.e. get on rappel). Obviously, you don’t want to walk through a nest. Use good judgement.
EDD’S PLACE (aka The East Bluff)

Photo: Robledo
Historically this area hasn’t seen much traffic due to the difficult long approach. In 2014 a new road was cut on top of the bluff that, if you drive, puts you within a 15 minute walk to the top of Spiral Staircase. But a gate has been installed about 200m from the Lighthouse road. This gate is locked on weekends and (apparently) at 5:30pm weekdays, and you don’t want to get your car locked in. I’m investigating simplifying this approach but for now, here’s the beta.
Take the Lighthouse Road to Peters Road which previously only went left (north). Note your odometer reading and turn right onto the new gravel road on the right. Drive to the gate, about 200m.
Driving directions: if the gate is open, drive in and see if you can find a person who can tell you if/when the gate will be locked. They are raising goats, so you may need to find the goatherd. Ask them what the situation is, then choose accordingly. If you can be gone by the time they lock the gate, or they trust you to lock it after you leave (ask!), you’re good to go. Continue driving, 2.0km (1.24 miles) from the Lighthouse road, to the second pull-out on the right and park.
Walking directions: Park outside the gate and start walking, passing cisterns, many wild papaya and mango trees, a banana plantation and goat pens. Stay on the main way, to the second pull-out on the right. The road dead ends about 300m past the pull-out.
Common directions: From the second (last) pull-out, you can see the cairn at Spiral Staircase but it is practically impossible to walk directly at it due to very thick vegetation. So walk further down the road about 100m. Turn right off the road and head for the cliff edge angling right. Spiral Staircase is between some large bushes that grow right on the edge of the bluff and there’s a large cairn and a yellow tag (2015). Boots and gloves are recommended. Shade about 1:00 in March.
(See Also the description of Jumbo Shrimp at Wave Wall for an alternative approach to Edd’s Place.)
****Spiral Staircase Ti, T, 10a. 2/12/2 One of the island’s best tens with an outstanding lower belay position! Shares lower belay with Limestone Pirate. Girth-hitch slings to the bolts instead of draws so you don’t cross-load the biners. Pre-clip the first bolt while still on rappel to prevent a factor-two fall onto the belay. Smooth pocketed rock leads to a cave with a spiral staircase, or crank straight up at the bolt (mid-5.10). JE
****Limestone Pirate Ti, 11a. 2/12/2. Steep and excellent! Fun moves with a couple of exciting reaches. Shares Staircase lower belay. Top anchor bolts are hard to see from above, under a small overhang. Pre-clip the first bolt while still on rappel to prevent a factor-two fall onto the belay. JE
Jumpin’; 11d/12a. 2/10/2 Surprise holds; obvious big move at beautiful Caymanite shelf. Might as well jump! JE & JY
THE NORTHEAST POINT
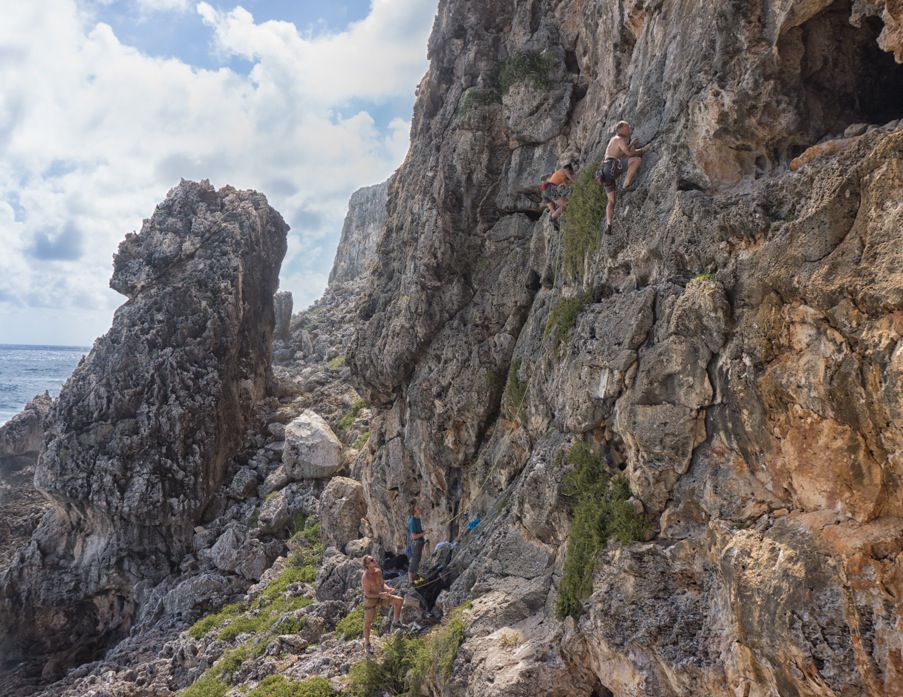
Drive down the Lighthouse (Major Donald) Road about 6 miles (10km) to the east end of the island and park at the lighthouse. Follow the obvious trail to the left. About 15 minutes driving from Bluff View. Boots and gloves highly recommended for these approaches! Routes listed right to left as you look towards the water. Look for tortugas and dolphins while you belay! Shade almost all day in winter, starts to get morning sun at the top in late-March. By May there’s shade on most routes by 3pm.

The Point features routes from 100 to 140′ long. (Larry Hamilton)
**I Got 99 Turtles Because A Shark Ate One Ti, 510c/d 2/11/2. The closest route to the parking area. Walk approximately 100 feet from the parking area and spot the conspicuous cactus near the edge. 99 Turtles is just behind this cactus in an obvious gray dihedral. Beautiful holds and movement on a clean slightly overhanging wall. Sustained jug pulling to stemming corner at the top. Comfortable belay in a small cave at the bottom. Be sure to look for turtles and big fish from the belay. Well protected. Goes into the shade about 2pm in March.
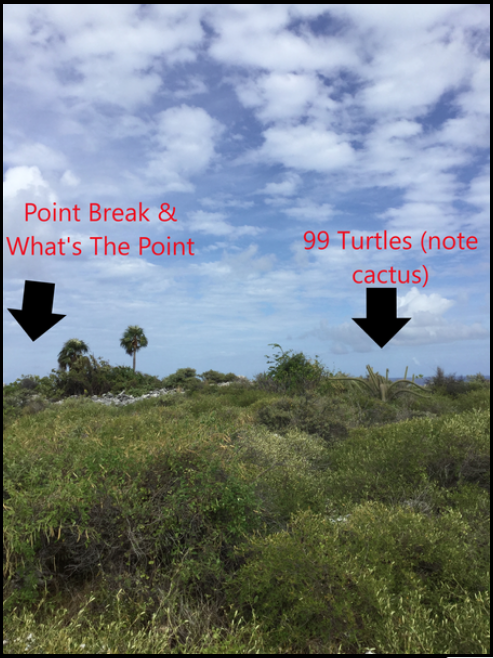
About 100m from the Lighthouse parking there is a cairn next to the trail. From this first cairn, look straight out towards the edge to see some large bushes and a few palm trees. To get to this group of routes, walk towards the edge from the first cairn, then angle right (easiest walking) to find the route of your choice.
***Point Break Ti, 10b/c 2/14/2 Shares the anchor and top 3 bolts with What’s the Point? and angles to climber’s left onto the East face; goes into the shade about 2pm in March. Steep jug hauling thru huecos on clean white rock, stalactites and Caymanite, a face climbing crux, the only disappointment is when it joins What’s the Point and gets a bit sharp.
*What’s the Point? Ti, T, 5.9 2/13/2. A little run out if 9 is your limit, and sharp at the top, but an impressive position. Anchors are over the edge on a slab. Beware the waves! One day a wave broke OVER my belayer, like a surfer in a tube, and left her scared but dry! GB
****Freedom Ti, T, 12c 2/17/2. About 60’ left of What’s the Point. Anchors are just below the left side of a large block. Three 5.12 cruxes: technical, mono pulling and a roof. LG & JE
****Throwin’ the Tortuga Ti, 11b 2/11/2. 5’ left of Freedom; anchors are next to a diagonaling crack that splits the cliff edge. Shares bottom belay with Freedom. Beautiful huecos filled with globular crystals lead to an airy, orange arête. Then up a steep flake system and over a bulge to a final technical finish. Rock & Ice #69 cover photo! JE
***A Porcupine Named Fluffy Ti, 11c. 2/12/2. 20′ left of Tortuga look for the anchor bolts just above a small reddish ledge with a small bush. A steep wild start leads to a devious technical crux. The first bolt will prevent a factor two fall onto the belay. Clip it with a long runner or back-clean it after clipping the next one to reduce rope drag. Shares top and bottom anchors with Renegade. JE
**Renegade Ti, 11d/12a. 2/14/2. Shares top and bottom anchors with Fluffy. Cast off to climber’s right while on rappel and follow the bolts down. Amazing steep start, a rest, then technical cruxes on sharp rock in the headwall. JE & LG
*The Devil Wears Flippers Ti, T, 11a 2/16/2. 40’ left of Fluffy around a bush. Anchors are drilled straight down in a pothole at the cliff edge. Girth-hitch these with long slings to prevent cross-loading your biners. Long, sustained, steep and annoyingly sharp in places. Trends left, then right; take a long sling for the left-most clip. CL
***Spermy the Whale Ti, 11c/d 2/14/2. 5’ left of Devil. Shares The Devil Wears Flippers lower anchor. Nifty long diagonal huecos above the low crux. Technical and sustained. JE
Approach the next climb by staying on the trail and walking past the first cairn about 20m to a second cairn; or about 120m from the car park. Now head towards the edge and slightly right to a lone palm that’s on the edge of the bluff. This avoids scary bushwhacking on the cliff edge.
***Shiver Me Timbers Ti, 10b 2/13/2 Located in the first big dihedral with a convenient palm tree anchor. An easy rappel set-up, short crux and a belay ledge high off the water makes this a good choice for your first Point route. SH

Dawn on Shiver Me Timbers, 10. Todd Mummert
Approach the following four routes by staying on the trail for about 75m past the second cairn until you find two more cairns. Walk between the cairns on a faint trail that angles left to a rocky area. Then angle right following the path of least resistance to a narrow break in the brush. This will put you a few feet right of Blackbeard’s Revenge. These routes are a good choice for days with rough seas as the belay ledges are about 8m above the water!
**Blackbeard’s Revenge Ti, T, C, 10b 2/9/2 Find the top anchor bolts just below a flat shelf, in a square-cut alcove. Shares Walking the Plank bottom belay, so you can do both routes without moving the rap rope. Interesting line with fun moves on duos, edges, and side-pulls. SH
***Walking the Plank Ti, 10c. 2/12/2 Top anchor is 8’ left of Blackbeard’s. Bottom belay is to the left when rappelling. Find the hidden pocket, pull over the first bulge and grab the handle! More amazing holds in the black & orange dihedral lead to the blind crux. SH

Katy Walking the Plank on a calm day.
**No Problem, Mon Ti, C, 10a. 2/9/2 Top anchors in a big white dihedral about 20′ left of Plank. Perfect belay ledge is to your left on rappel. Go right and up a somewhat blind arete/bulge to photogenic moves on the white arete. Make a pretty step-across to the belay. SH
To find the Wall of the Early Morning Flight follow the trail approximately 125m past the No Problem Mon double cairns to another cairn. Angle slightly right to a lone bush near the edge. There’s also a square, faded-red painted, concrete “DOS” survey marker about 5m to the left of the routes.
**Holy Huecos Batwo-mon Ti, Tag, 5.10c 2/14/2 Look for the anchors down low, on the left side of large, ugly “V” cleft. Remember Charybdis, the terrifying whirlpool in the Odyssey? This route will make you feel like a Greek hero if the seas are rough. A hook-shaped rock protrusion creates an inverted-whirlpool effect and rogue waves can inundate the belay! More than one person has gone through the wash cycle and it’s never on “Delicate”. After rapping to the first set of double bolts, look for wet rock below you and examine the surf for a few minutes before committing. You can belay from the higher set of anchors, so you miss the lower crux, but it’s still 10c. LG Here’s a video during big surf!
https://www.youtube.com/watch?v=JEHI_2zMt8I

John on Holy Huecos Batwo-mon with the whirlpool below.
***Spine-less Ti, 11d 2/15/2 Top anchor bolts are just right of the large bush, on the right side of a triangular ledge, just below a 4-inch overlap. Shares the Holy Huecos bottom anchor and the Chicken top anchor. Travel up incredibly smooth, steep hueco-ed rock. Enter a rest cavern with optional thread. Straight up and out to an incredible tricky thin crispy finish. JE & LG
****Chicken of the Sea Ti, Tag, 12a 2/10/2 Shares Spine-less top anchors. Exposed and sustained! Follow the big holds past the last bolt for a true “photo finish” or head straight for the anchor. JE & LG
***Hot Tuna Ti, 12a 2/8/2 Top anchors easily seen 6 feet left of the Chicken anchors. Bottom anchors in a cave. Follow smooth, steep, white rock. JE & LG
*Beach Fire Ti, C, 10c 0/7/2/6/2 (2 pitches) 165’ past Tuna, rap a chimney system past a nasty ledge to a unique and very isolated rock “beach” (great position, calm seas only!). Climb back out in two pitches, starting with a left arching crack-like system. The first pitch (crux) is excellent; unfortunately the second is mostly just pointy. EH, SRB
Mud Falcon Ti, 5.11b Top-rope variation to Beach Fire. Thread the intermediate anchors on your way down (in a shallow groove off to climber’s left), and top-rope the steep straight-in crack system. VW
NEPTUNE’S LAIR
Park at the east end of the North Side road in the Spot Bay turnaround. Follow the trail east and then walk the Long Beach toward the big pointed rock in the sea and the micro-island “Little Cayman Brac”. If the water’s calm, stay close to the water when entering the boulder area. Otherwise, you can scramble at mid-height, aiming for the steep white face. About 20-25 minutes from the car. Wear gloves & boots.
The routes face due north (early morning shade) and in winter can take a long time to dry after being hit with sea spray, so it can be very smarmy. By March, April and May the wall is baked dry by the late-day sun and you should find it crisp the next morning. I’ve been there when it was crisp and also when it was so slippery it was almost unclimb-able. YMMV!

The approach to Neptune’s Lair during rough seas. Abort! Abort! Larry Hamilton
***Calypso Ti, 11c 7 bolts + anchor. Several cruxes and a throw will sweep you off your feet. LG
**Booby Eggs for Breakfast Ti, 11a 10 bolts + anchor. Follow the crack to the cave, and then power up to the top. Tape your right index finger between the first and second knuckle (middle flanges)! LG
****The Poseidon Adventure Ti, 12a 10 bolts + anchor. Several people have called this the best 12a they’ve ever done! Steep and wild. LG

John on The Poseidon Adventure during an early redpoint attempt. (Hamilton)
***The Tempest Ti, 13-ish, 11 bolts + anchor. This route has never seen a free ascent to my knowledge. Shares Poseidon top anchors. Two hard, powerful cruxes getting past big bulges using small pockets. Open project. Rebolted 2012 JB. LG
SPOT BAY
Take the North Road east to the little town of Spot Bay. A few hundred yards past the “25” speed limit sign, on the left, is the Creek and Spot Bay Junior School. On weekends and school holidays, you can park in the school lot. Otherwise, park in the vacant lot opposite the school next to Berg Dixon’s house (see photo below).
This area has three Sectors, East to West: Pinky’s Buttress. Iguana Wall and Dixon’s Wall.
Free hanging stalactites break!
Over the years many of the amazing free-hanging stalactites have been broken off by climbers unfamiliar with this type of hold. This significantly changes the character and grade, as well as diminishing the enjoyment of the climb. If you undercling/pinch a stalactite at its base (top) or pull mostly down, it’ll stay there. However, if you crank or stem on the bottom end, or knee-bar behind it, it’ll probably hurt you and then hit your belayer!
Flowstone features, also called tufas, look like a stalactite that’s glued on the wall for its entire length. These are quite solid and have taken a lot of use from a lot of climbers; don’t worry about these.

This 50lbs (23kg) stalactite broke when Vance knee-barred behind it. It gave him 7 stitches in his arm (note bandage) and almost killed his belayer. (Darek Kroll)
Pinky’s Buttress
From the school parking lot walk east on the road 30 seconds to Neptune’s Way and the Variety Store (alternate parking). Follow Neptune’s Way, staying on the right near the chicken coops, to reach the beautiful orange wall. Alternatively, walk east from the Iguana Wall, 3 minutes. Morning shade until about 3pm in March.
This buttress has the only access issue on the island. Ernie, who lives in the last house on the left (opposite the chicken coops), will come out and yell at you. He will tell you Neptune’s Way is a private road but actually it’s a public road. He will say you’re on his property but you’re not. The cliff itself and the land adjacent to it is Crown Land, which is public. The land immediately next to the buttress is not his either, and we have permission from the owner to cross it. He’s put up “No Trespassing” and “Keep Out” signs, but they are not on his property and he has no right to do so (this may be fixed soon). He has no right at all to keep you from climbing.
Basically, he yells at you and makes it unpleasant to be there, hoping you’ll go away. He threatened to call the police on me, and I invited him to do so, that shut him up for a full minute. He has a history with the police, and it’s not a good one.
My recommendation: See if there’s a vehicle parked at his house. If there is, you’ll probably find it more pleasant to climb somewhere else. If there’s no vehicle, go ahead and climb and be assured there’s nothing illegal or wrong with you being there.
From left to right:
*Hand Me The Can of Tuna, Boy Ti, vhard 4 bolts + anchor. A very tall boulder problem. Open project. Mandatory stick clip. Crank like a disease to the lip then dance to the anchor. JA 2013
****Full Metal Jackfish Ti, 12b 12 bolts + anchor + belay bolt. Mandatory stick clip. A boulder problem (V5) leads to excellent climbing on the beautiful orange wall above. Don’t feel bad about just pulling up to bolt #1 and continuing from there for a **** 11c. The belay bolt holds the rope out of the way for the boulder problem. Unclip it when the climber gets to #2 and you can walk out and see him for the rest of the route. JA 2013
Iguana Wall
This wall is loaded with tufas, stalactites and pockets. Most routes have hard starts and high first bolts (stick clip), and a belayer’s bolt. Clip the belayer’s rope to the belayer’s bolt to keep leader and belayer from a hard meeting should there be a fall low on the route. After clipping #3, the belayer can unclip their rope and move out to watch.
From the school parking lot, walk or drive east on the road about 5 houses past Berg’s house. Turn right down a paved lane which is opposite the Cayman Catboat Marine Heritage sign. Pass a cream colored house, #154, on your way to the end of the lane. If you’re driving, you can park here. Follow a faint path straight back to the wall, turn left for the Tufa routes, right for Iguana & Turtle Tufa Tango.
To approach from Dixon’s Wall (see below) stay relatively close to the wall on a rough trail. Cross a trashy area, climb “up & over” twice via easy scrambling to reach the Iguana wall. About 5 minutes. An easier 2 minute walk from Pinky’s Buttress.
These three routes are on the far left end of the wall, described left to right.
***Larry the Lime Lizard Ti, 11d 5 bolts + anchor + 1. Powerful and fun movement on a variety of hold types. JB 2015
***Tufa One Ti, 11c 5 bolts + anchor + 1. A sequential boulder problem leads to a jug-tufa. Go hard left at bolt #3, pull the bulge on good holds, then climb back right to the bolt-line. (Variation: climb straight up on micro-crimps, reportedly 12-) Fun, steep finish. JB 2015
***Tufa Two Ti, 12a 6 bolts + anchor + 1. Same start as Tufa One. Crank the boulder problem, clip (rightmost) bolt #2, traverse right then up. Pull the bulge and finish on hero holds. JB 2015
Marcus milks the rest after the crux on Tufa Two. Corbiere
The next two routes start at the far right side of the wall.
****Iguana without a G Ti, 12a 9 bolts + anchor + 1. Starts just right of an obvious rock shelf. Optional right knee pad. Powerful dynamic moves between great holds. JB 2013
**Turtle Tufa Tango Ti, 11a 11 bolts +anchor. A good route marred by a lack-luster bolting job. About 30′ right of Iguana on top of a shelf. Start with pinch moves up a double tufa system for several bolts to a tricky bulge. Put a long (12″) draw (not a double-draw) on bolt #6 (crux bulge) to prevent biner cross-loading and possible rope damage. SH & CT 2018.
Sarah doing the Turtle Tufa Tango, 11a, at the Iguana Wall. (Thomas)
Dixon’s Wall
This wall is world-class. You’ll notice lots of quality stars and it’s no exaggeration. North facing with large trees at the base, it’s shady almost all day in Winter. Access to the cliff is through the Dixons’ back yards.
Try not to swear loudly if it’s not your day, your voice will carry to the school across the road.

Berg Dixon’s house in Spot Bay with Dixons Wall rising behind. You can park on the grass just right of the utility pole. (Donaldson)
The green and white house with white picket fence opposite the school belonged to Mr. Hindenberg “Berg” Dixon, sadly now deceased, who welcomed climbers to his backyard wall for 25 years. Park in the open field next to the house and then follow the trail to the wall. The fruit trees are mango, papaya, naseberry, tamarind, pomegranate, lime and ackee.
Don’t wander far off the trail — there’s a rusty barbed-wire fence hiding in the weeds. The trail ends at Lizzard the Gizzard, where a faded red bulls-eye is painted on the rock. Routes described from left to right when facing the cliff.
Water Boarding Ti, 12c 4 bolts The far left route is a direct start to Chinese Water Torture; small crimps and a tricky compression move (or big dyno). RG 2016
**Chinese Water Torture Ti, 11d 11 bolts + anchor. Starts in an obvious dihedral 30′ left of Peaceful Warrior. A climb for all you crimp-lovers with some attention-getting bolt placements. The anchors are in a weird place. Stick clip #1 and put a long draw on #6. RG 2016
***Peaceful Warrior Ti, 12a 6 bolts + anchor. Starts 10 feet left of The End Justifies… and shares its last bolt and anchor. Easy to set up a top-rope. Sequential, powerful and dynamic climbing on pockets. RG 2016
****The End Justifies the Knees Ti, 10b 8 bolts + anchor. Starts at a fence post set in concrete that marks the property line. Tufa and stalactite climbing on a moderate route! Climb pockets and edges, clip #4, and sneak right. Put a double-draw on #5 then sneak up and left on good edges. Continue left then up on columns, stalactites and tufas. JB 2015
***OMG! Ti, 10a 8 bolts + anchor. Start 20′ right of the property line post on pockets in orange rock. Crank a boulder problem then pass the small cave using OMG-holds so good they made me LOL. Continue up the dihedral. JB 2015
**Rodeo Lover Ti, 10c 1 bolt + anchor. Extension of OMG! Check your spurs and hold on tight for this 8-second ride. JB 2015
*Wait! Wait! Stop The Bus! Ti, 11d 8 bolts + anchor. (Overheard as the school bus pulled away.) Starts off a flat boulder. A difficult, sharp boulder problem (V4) on small pockets right off the deck makes stick clipping #2 a good idea. Pulling up to #2 and then climbing is 10+. SK 2013
****Lizzard the Gizzard Ti, 11d/12a 10 bolts + anchor. Stick-clip the first bolt and boulder straight up, or climb in from the left. Fun pocket pulling leads to several powerful and somewhat baffling sequences in the overhanging headwall. JE & LG ( The first route on the wall, Jeff Elison bolted this on lead!)
****Dixon’s Delight Ti, 11b 10 bolts + anchor. This classic starts at a small arching roof with a flat orange hold below it. Climb straight over the 4th bolt on hidden pockets. Gain the ledge then decipher the moves into tufa territory. Beware a big chalked sucker-hold at the crux! JE & LG

Flowstone and stalactites are characteristic of Dixons Wall. John tops out Dixon’s Delight. (Donaldson)
****Hindenberg’s Harmonica Ti, 12b 12 bolts + anchor. Mr. Berg would play his harmonica at church every Sunday evening. The great pockets suddenly give out, making bolt #5 hard to clip. Get to the big lonely pocket, decipher the thin, insecure crux then finish on steep tufas and flowstone. MS 2011
****Out of Africa Ti, 11d 10 bolts + anchor. A favorite, this route has everything. Climb up the grey elephant trunks, decipher the blank-looking mid-section (use the mono) then finish on steep flowstone features. JE

John reaching for the mono on Out of Africa. (Donaldson)
****Buffalo Soldier Ti, Tag, 12a 11 bolts + anchor. Starts just right of Africa on a buffalo nose. Crimp, pinch and pocket your way to a good rest then launch into the powerful, pinchy, pumpy crux moves. Be gentle with the large stalactite on this route, and beware if you have large digits. JE

John pinching the tufas on Buffalo Soldier, 12a. (Darek Kroll)
***Captain Kirk’s First Voyage Ti, 10c 8 bolts + anchor. This nuevo classic starts on stacked blocks where a sea grape tree grows near to the wall. Stick clip, reach the first hold then link discontinuous tufas to the anchor. Great movement, great warmup. JA & JB 2013
*** Picard’s Dilemma Ti, 11c/d A0 9 bolts + anchor. Warp power or tractor beam? Starts 8′ right of Kirk’s at the edge of the Dixon’s old hurricane cave. Excellent but perplexing movement on a wide variety of cloaked holds might overload your sensors. The original tractor beam start involves stick clipping and pulling up to #1. There’s a rope ladder stashed in the cave. Variation: Warp Power V5. Added after the first ascent, linking the direct boulder problem start results in 12b. JB 2020, RI-DV 2020.
****Boom! Ti, 12a 9 bolts + anchor. About 8′ right of Picard’s. Mandatory stick clip. Start off the boulder or as many stacked blocks as you need to reach the starting holds. Jump onto the wall and follow a continuous line of tufas through the bulge. Brilliant! Please don’t break the small stalactite at the bulge! There’s a perfect pistol-grip pinch at its base (top) so there’s no need to grab the end of it. JB 2013
Jeff at the powerful lower crux of Carpe Stalactite.
****Carpe Stalactite Ti, 12b 7 bolts + anchor. Starts 20′ right of Boom below an obvious large stalactite. Optional right knee pad. Stick clip #1. Climb pockets and tufas to bolt #4 then seize the stalactite, step out onto it and climb it on the outside! Excellent movement on amazing holds leads to a sequential crux right at the end. Caution: There is a long, thin, grey stalactite in the “armpit” of the big stalactite that is purely decorative! Do NOT grab or stem it; it will likely break! As a precaution, position your belayer and rope well left of the drop zone. JB 2014
****In Vino Veritas Ti, 13b 8 bolts + anchor + belay bolt. Right knee pad. Start about 15′ right of Carpe on the flowstone at the bottom of an almost blank face. A boulder problem leads to the crux jump up to a jug pocket. Stick that, negotiate the tricky face and find a knee-bar rest in the steepness. Pull the big bulge and try not to whip off the final thin crimps. JB 2016
John at the bulge at the top of In Vino Veritas. Donaldson
****Pole Dancer Ti, 13a 7 bolts + anchor + belay bolt. Climbing Magazine called it “a power-endurance masterpiece”. Start at the end of the big rock shelf. Sequential climbing leads to the top of a coarse tufa. Bust left, then up, then back right to the long tufa-pole. Dance strenuously upward. Equipped by JB 2016
Daniel Girard on the first ascent of Pole Dancer: www.youtube.com/watch?v=V6tAXJ9z9ko&sns=em
HERITAGE WALL
The crag behind the Cayman Brac Heritage House on the north side (about 0.5 miles West of Dixon’s Wall) – look for the fountain from the road. This is a public park with plenty of parking. Park in the back of the park and look for the trail towards the right side of the property. Please don’t step on the pumpkin/watermelon vines. Trail is to the far right of the obvious boulder. Follow the telephone wire railing.
Trail leads directly to the crag. Routes from right to left at the bottom of the wooden stairs. May Cow is the first route where the trail meets the bluff.
*** May Cow Ti, 5.9+ 7 bolts + anchor. You might stick clip #2, but definitely put a long draw on #3. Interesting line around corners and bulges. The May Cow has red eyes and haunts the caves of Cayman Brac, preventing dishonest persons from stealing mangoes. RI-MP 2017
** Rolling Calf Ti, 11c/d 1 bolt + anchor. Skip the anchor to May Cow and head left up the big roof. The May Cow dragged a chain and made lots of noise in May (coincidentally around harvest time for farmers). RI-MP 2017
Anansi Ti, 13a 6 bolts + anchor. Hard, steep, blank. Might benefit from more cleaning. Clever spider from Caribbean folk tales, considered to be the spirit of all knowledge and stories. RI-MP 2017
Head up the wooden stairs and scramble up the rocks to the next set of routes.
***Bracchanal Ti, 5.12b 7-8 bolts + anchor. Throw up the big pockets on the blank arete, then up the beautiful flowstone. A bit sharp at the top. First ascent was made on the day of the Bracchannal parade. RI-MP 2017
Miha on the first ascent of his route Bracchanal.
***Greasy Pole Ti, 5.10c 5 bolts + anchor. Tufas up the corner of the dihedral. Super fun and funky moves for the grade. Bolted right after the greasy pole competition at the annual Agriculture Show (which Miha won!). Not as slippery as it looks (or sounds). RI-MP 2017
***Ping ping ping Ti, 5.10b 6 bolts + anchor. Very enjoyable face climbing up orange rock. The tree is off-root! Ping, ping, ping I am coming – Folk song by the late Mrs. Leila Ross describing a vicious attack of mosquitoes. You might bring bug spray to this crag. RI-MP 2017
**Iguana Crossing Ti, 5.10c/d 5 bolts + anchor. Shares first 2 bolts with Ping, head left at the second bolt to the anchor of Iguana Droppings. Face climbing. RI-MP 2017
*Iguana Droppings Ti, 5.7 5 bolts + anchor. The easiest route on the north side. Fun climb but a bit sharp in places. Shares the anchor with Crossing. RI-MP 2017
**Iguana Hideaway Ti, 11c 1 bolt + anchor. Head straight up from the Droppings/Crossing anchor for a short, powerful and fingery face climb. RI-MP 2017
Routes Established by:
- SH Skip Harper 1994, 1995, 1996, 1997
- GB George Bracksiek 1995
- JE Jeff “Mort” Elison 1995, 1996, 1997
- LG Lizz Grenard 1995, 1996, 1997
- CL Craig Luebben 1995
- DN Dave Newton 1996
- JW Jonny Woodward 1996
- JY John Young 1997
- SB Susan Bolton 1998
- AP – Al Pacifico 1998
- EH – Eric Hirst 1998, 2000, 2001
- VW – Vance White 2000, 2011
- SRB – Simone Brisson 2001
- MS – Mike Snyder 2011
- JB – John Byrnes 2011, 2012, 2013, 2014, 2015, 2016, 2018, 2019, 2020
- SK – Sam Kabota 2013
- JA – Jeff Achey 2013, 2014
- RG – Ryan Galloway 2016
- RI-MP Rock Iguana – Miha Popovic 2017
- RI-AR Rock Iguana – Angle Robledo 2017
- RI-DV Rock Iguana – David Verhoeven 2017, 2020
- RI-WV Rock Iguana- William Verheoven 2019, 2020
- SH & CT – Sarah Hudson and Chris Thomas 2018, 2019